Use GenomeDK
An introduction to the GDK system and basic commands tinyurl.com/GDKslides
2026-03-15
Get the slides
Webpage: https://hds-sandbox.github.io/GDKworkshops/
Slides will always be up to date in this webpage
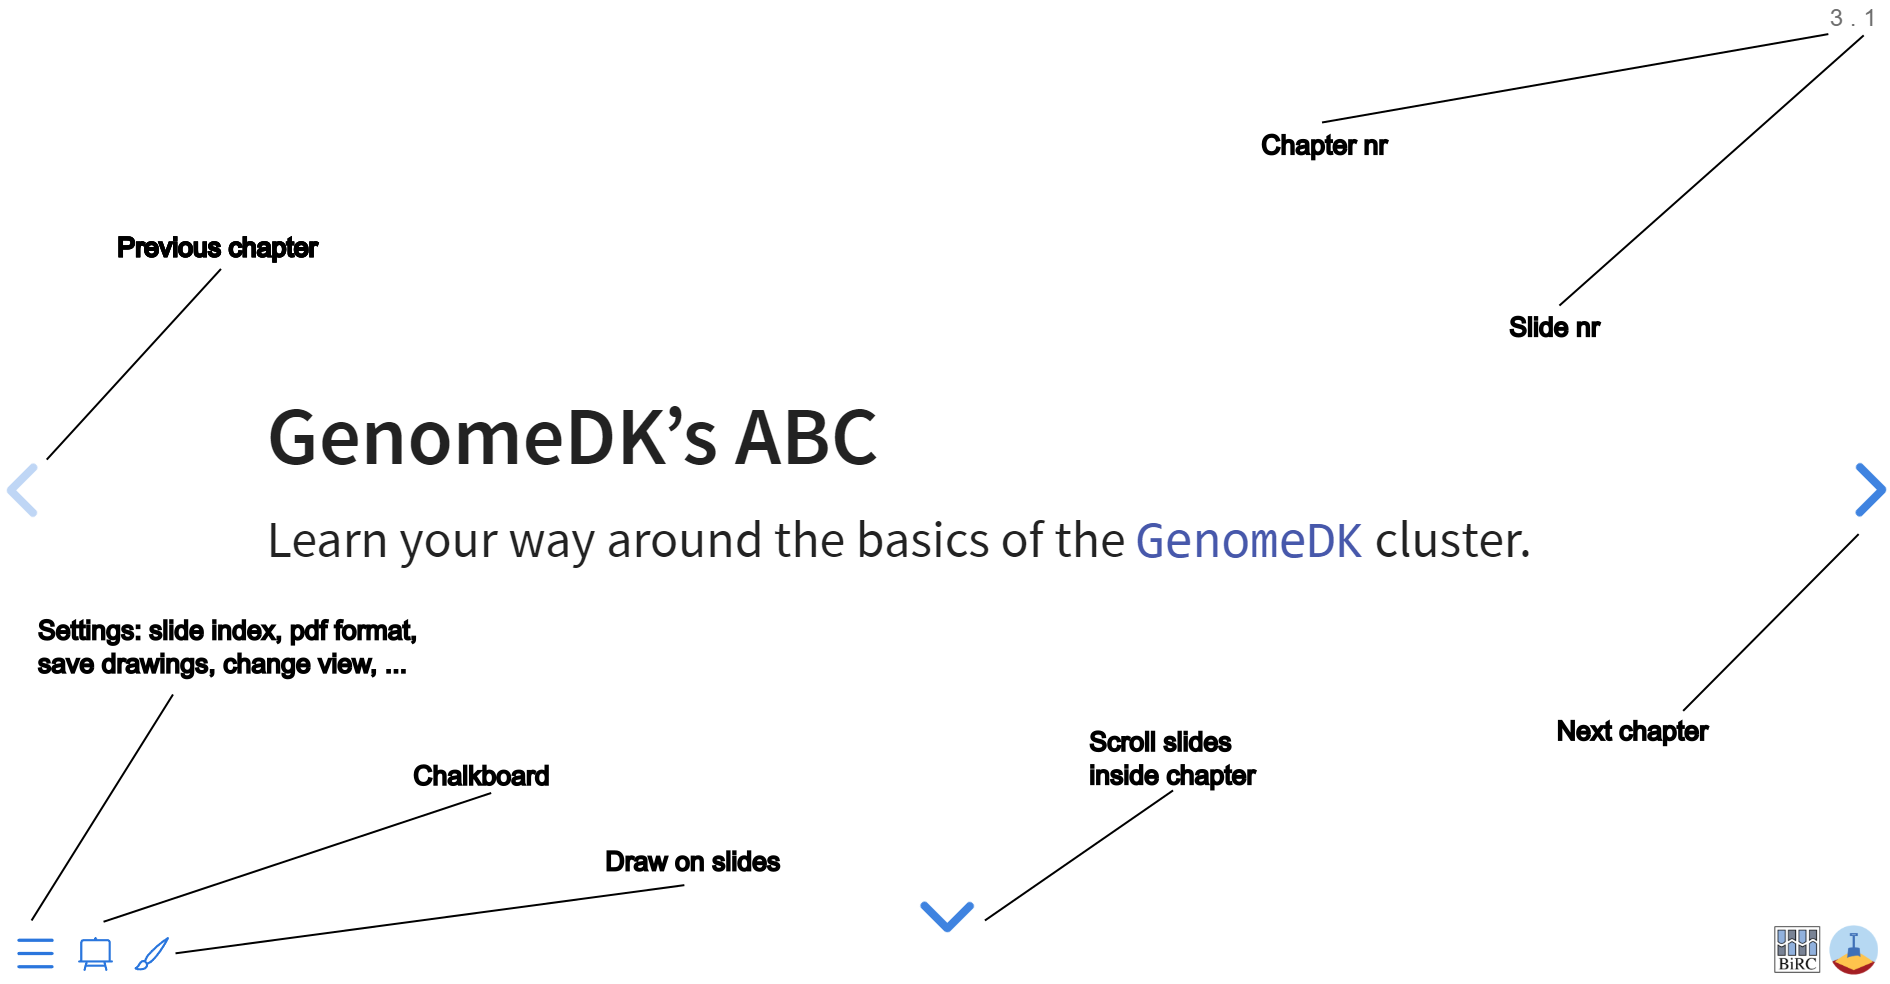
Navigate the slides


HPC cluster from the backside

One node being mounted

A single node with CPU and RAM
CPUs and cores
A CPU (Central Processing Unit) executes instructions from programs.
A CPU has multiple cores, each core can execute instructions independently at the cost of reduced bandwidth

Accessing a HPC
Powershell (Windows) or Terminal (MacOS, Linux) are powerful tools to interact with a HPC cluster.
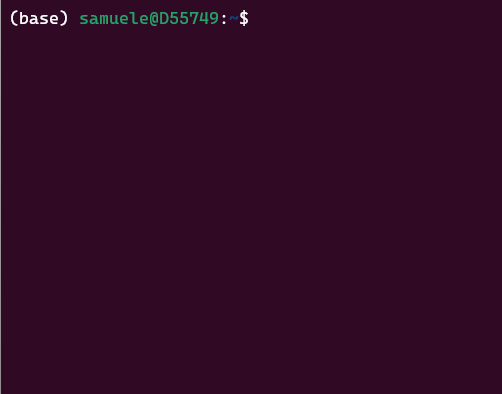
Terminal for MacOS and Linux. This is called powershell in Windows.
Interactive desktop
GenomeDK also has an interactive desktop interface at desktop.genome.au.dk which can be used to access the cluster through a web browser. More on that later.
Terminals look old, but it gives you enormous flexibility through efficient commands and scripting possibilities.

An old “Dumb Terminal” from the 1970s
Getting access to GenomeDK
Creating an account happens through this form at genome.au.dk
![]()

How the FS is organized
Folders and files follow a hierarchy
/is the root folder of the filesystem - nothing is above that- the FS is shared across all machines and available to all users
homeandfaststorageare two of the folders in the root- projects are in
/faststorage/projectand linked to your home
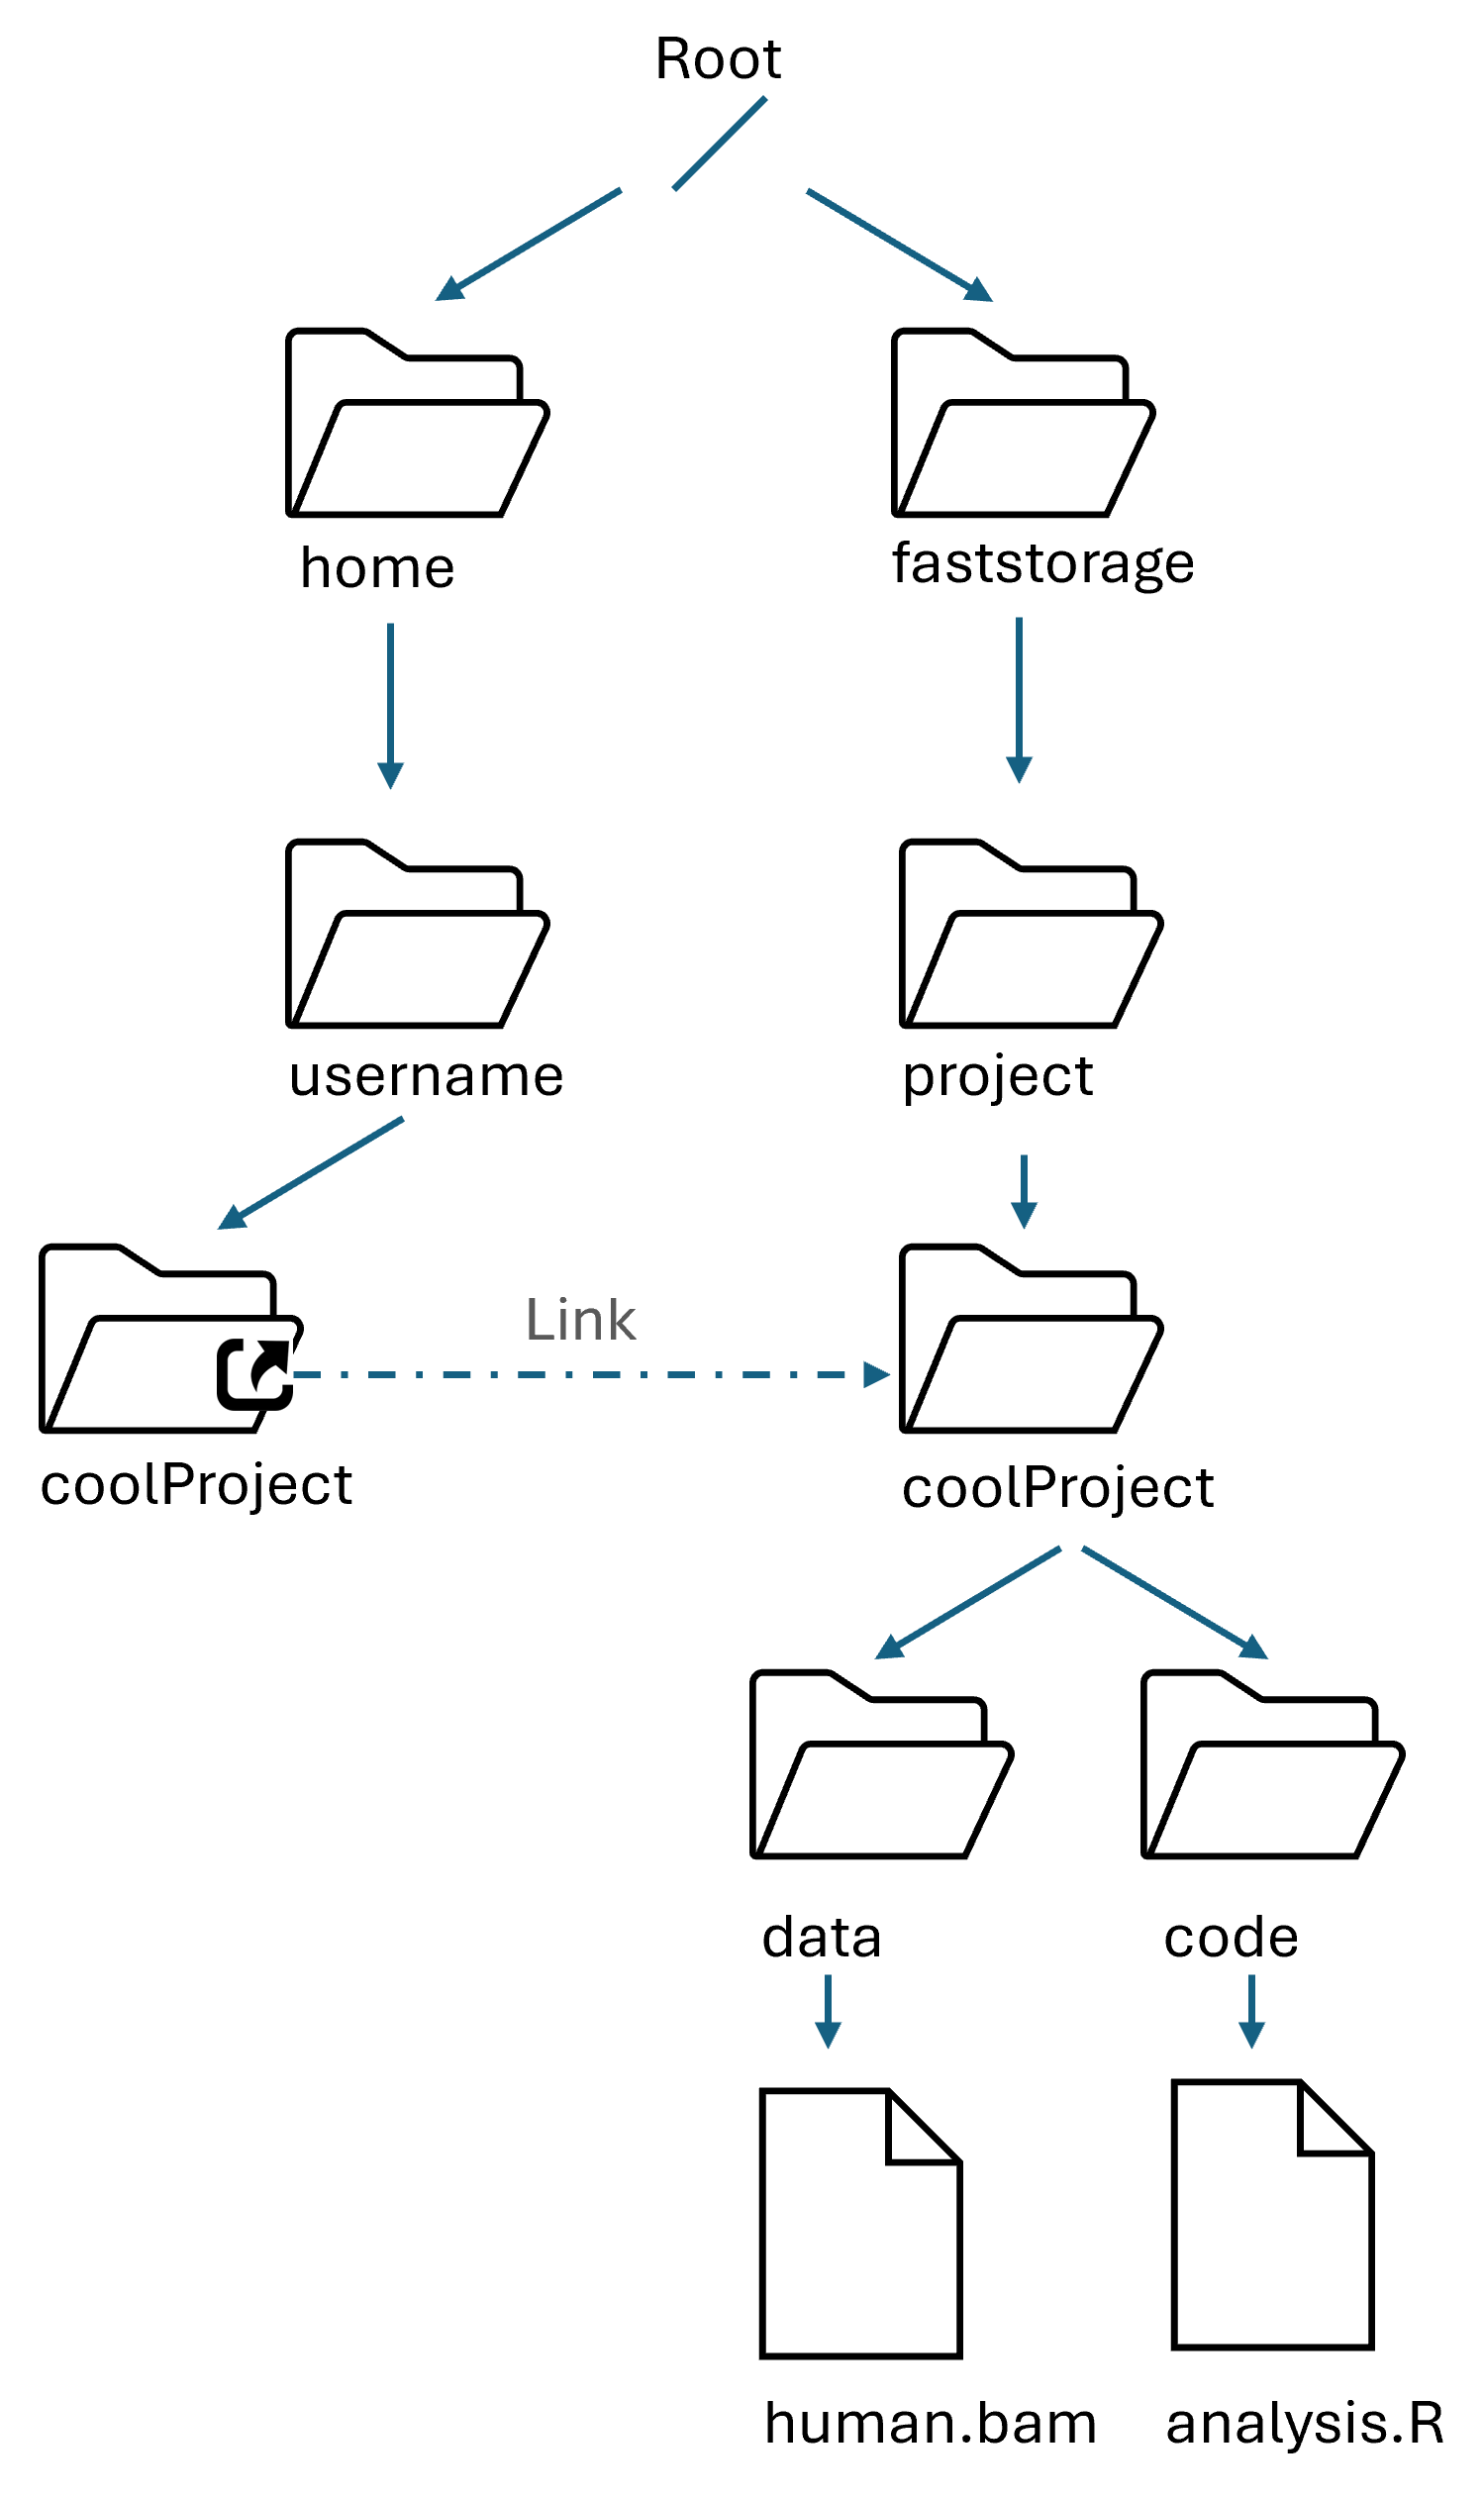
Look at the File system tree and answer to the following questions:
Folders management
Have a coherent folder structure - your future self sends manu thanks.
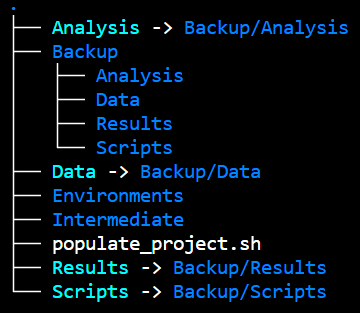
Example of structure, which backs up raw data and analysis
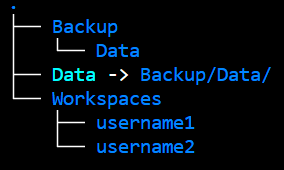
If your project has many users, a good structure can be
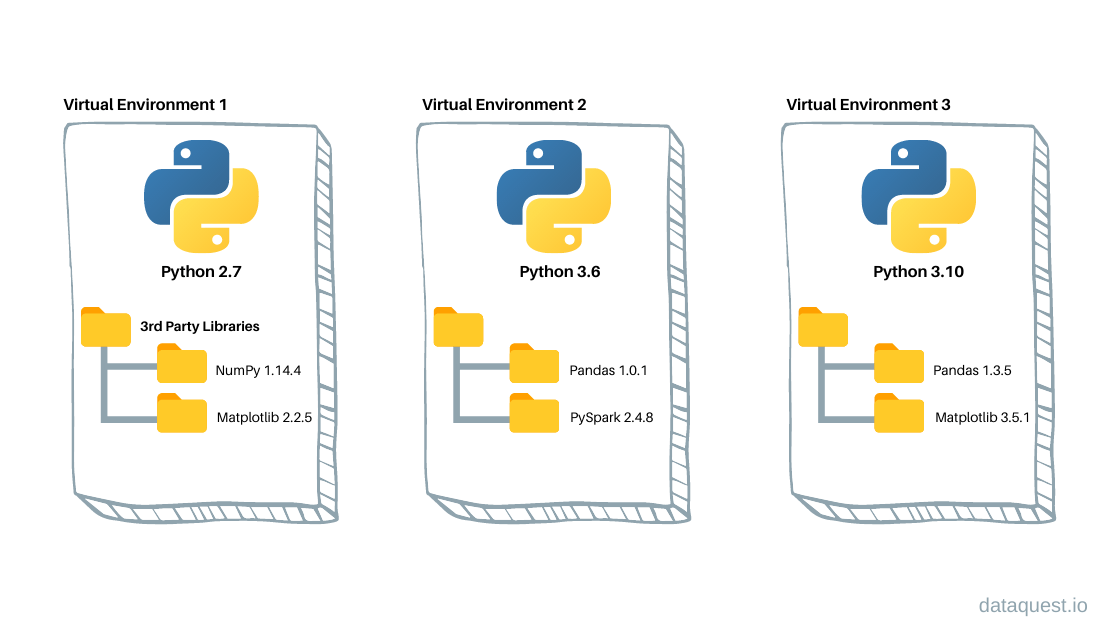
How virtual envs work: packages at different versions are kept separated into folders, together with all system files needed to make them work.
A package manager puts together the dependency trees of requested packages to find all compatible dependencies versions.
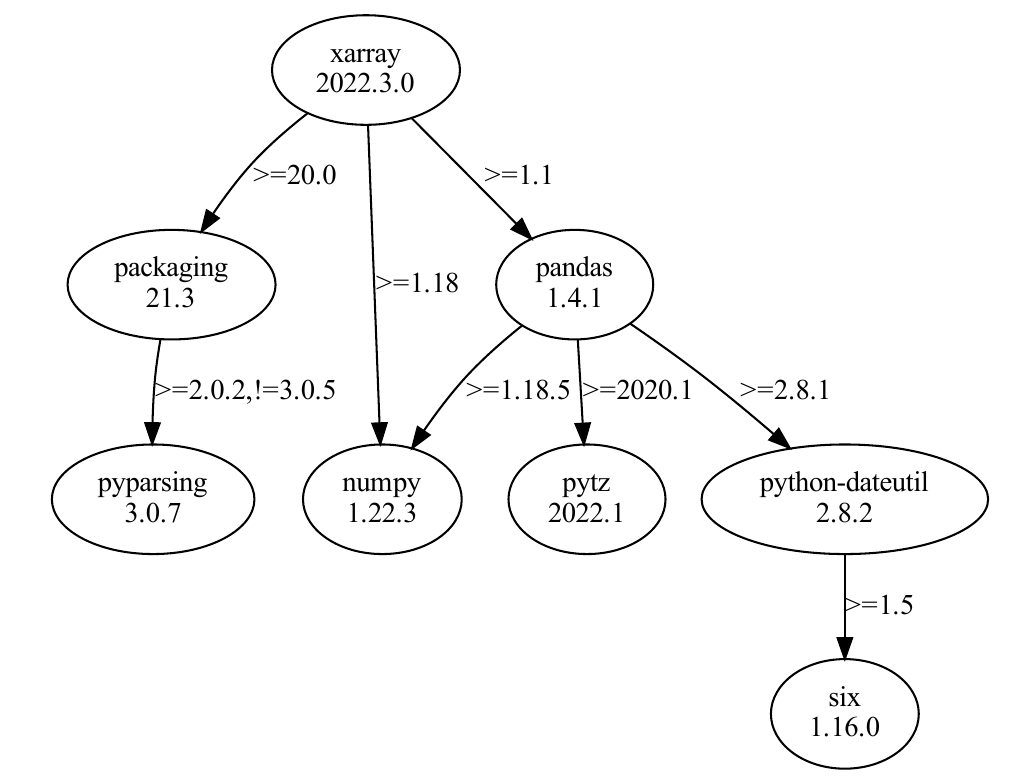
Figure: A package’s dependency tree with required versions on the edges
To install a specific package in your environment, search it on anaconda.org:
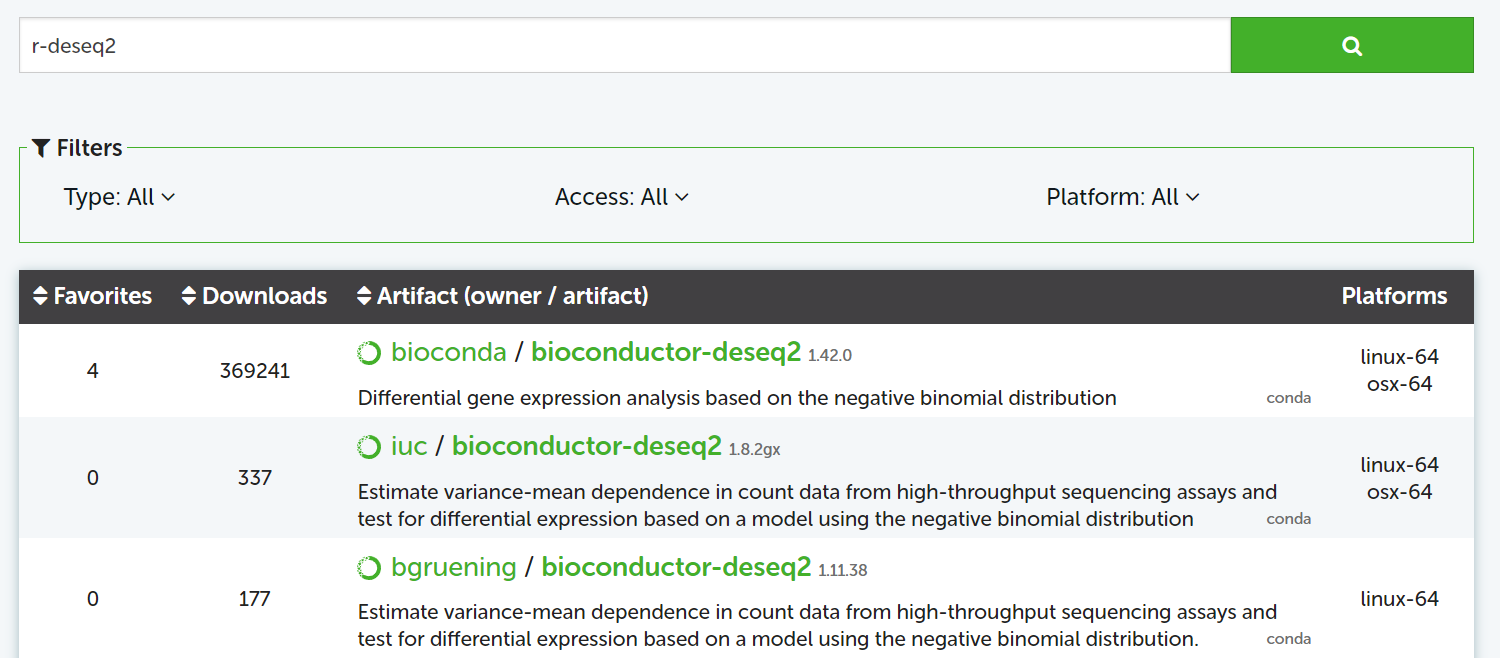
Figure: search DeSeq2 for R
Channels
packages are archived in channels. conda-forge and bioconda include most of the packages for bioinformatics and data science.
conda-forge packages are often the most up-to-date.
Exercise - Pixi
First of all, we open the desktop interface to GenomeDK at desktop.genome.au.dk. Choose the open frontend for the login.
The desktop session will be operative even if you close and reopen your browser afterwards!
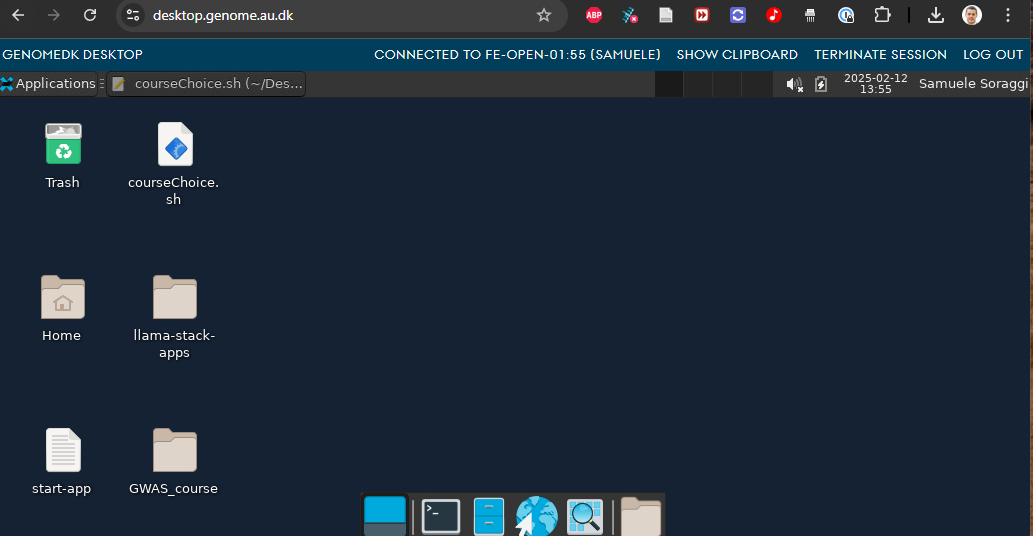
The terminal will work as if you logged into the frontend (The desktop is logged into the front-end node already). You can also use the browser!
Use the file browser and open the GDKintro folder

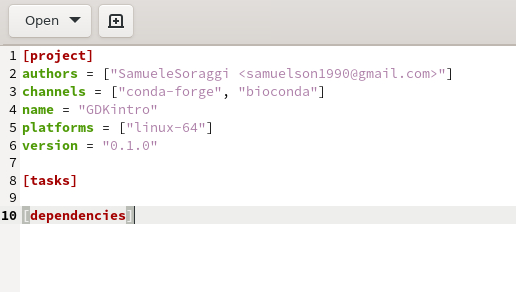
You can see some new files. pixi.toml contains info pixi will use to create your environment.
Open pixi.toml with the text editor, and make sure you have the two channels conda-forge and bioconda as you required with the pixi init command. You can always add more channels if you find out later that you need them for specific packages
Now get back to the terminal and install some packages. Your working directory MUST be the same where pixi.toml is located!
pixi add rstudio-desktop jupyterlab r-ggplot2 r-dplyr pandas
The terminal will look like this at the end

Press on Quick Connect. As a result, you will establish a secure connection to GenomeDK. On the left-side browser you can see your local folders and files. On the right-side, the folders and files on GenomeDK starting from your home.
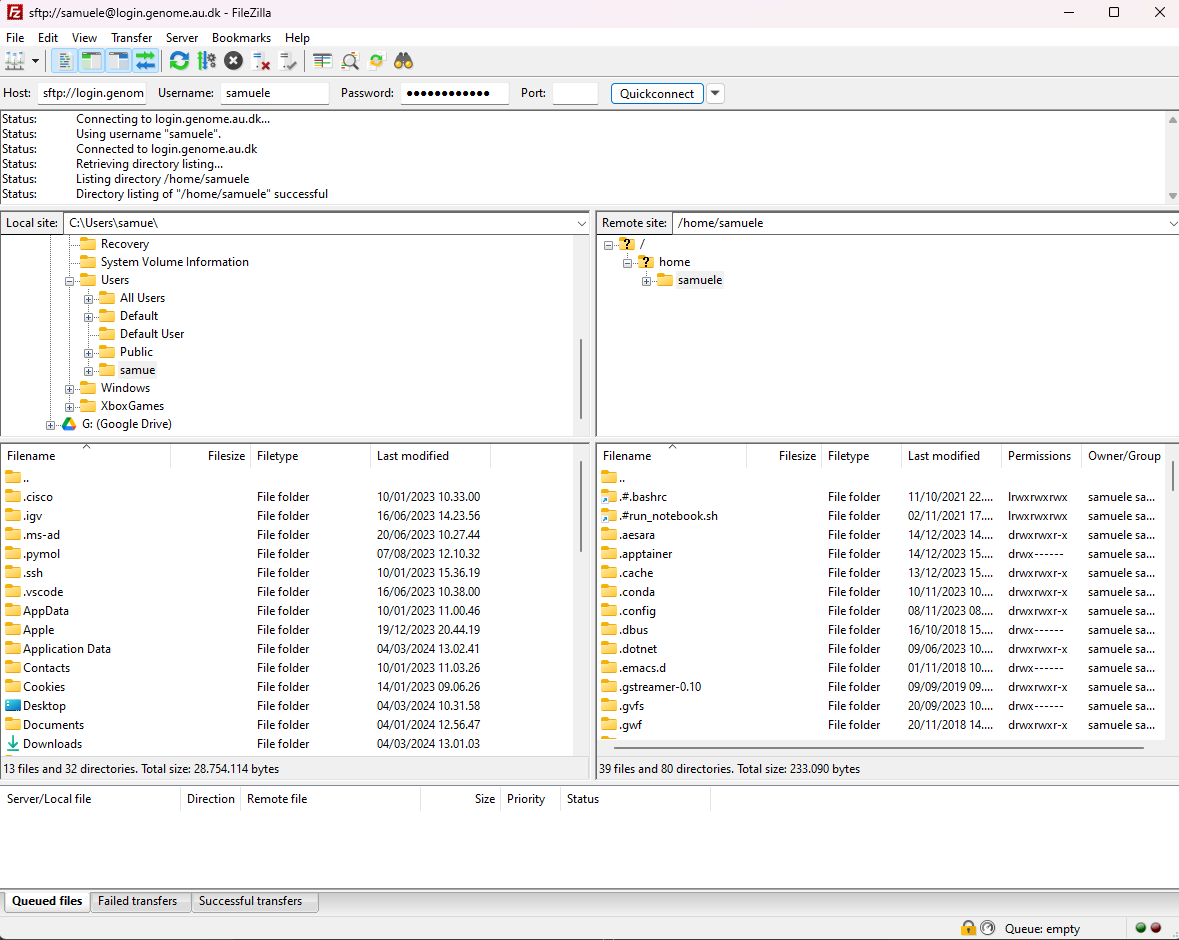
Download the environment.zip file. You need to right-click on it and choose Download
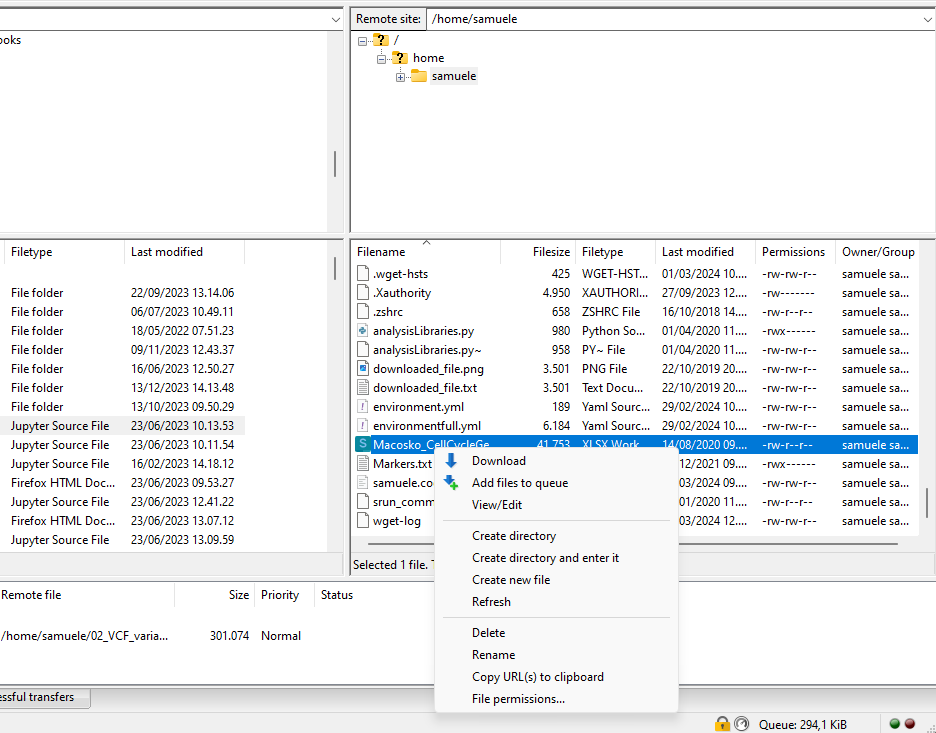
You can do exactly the same to upload files from your local computer!
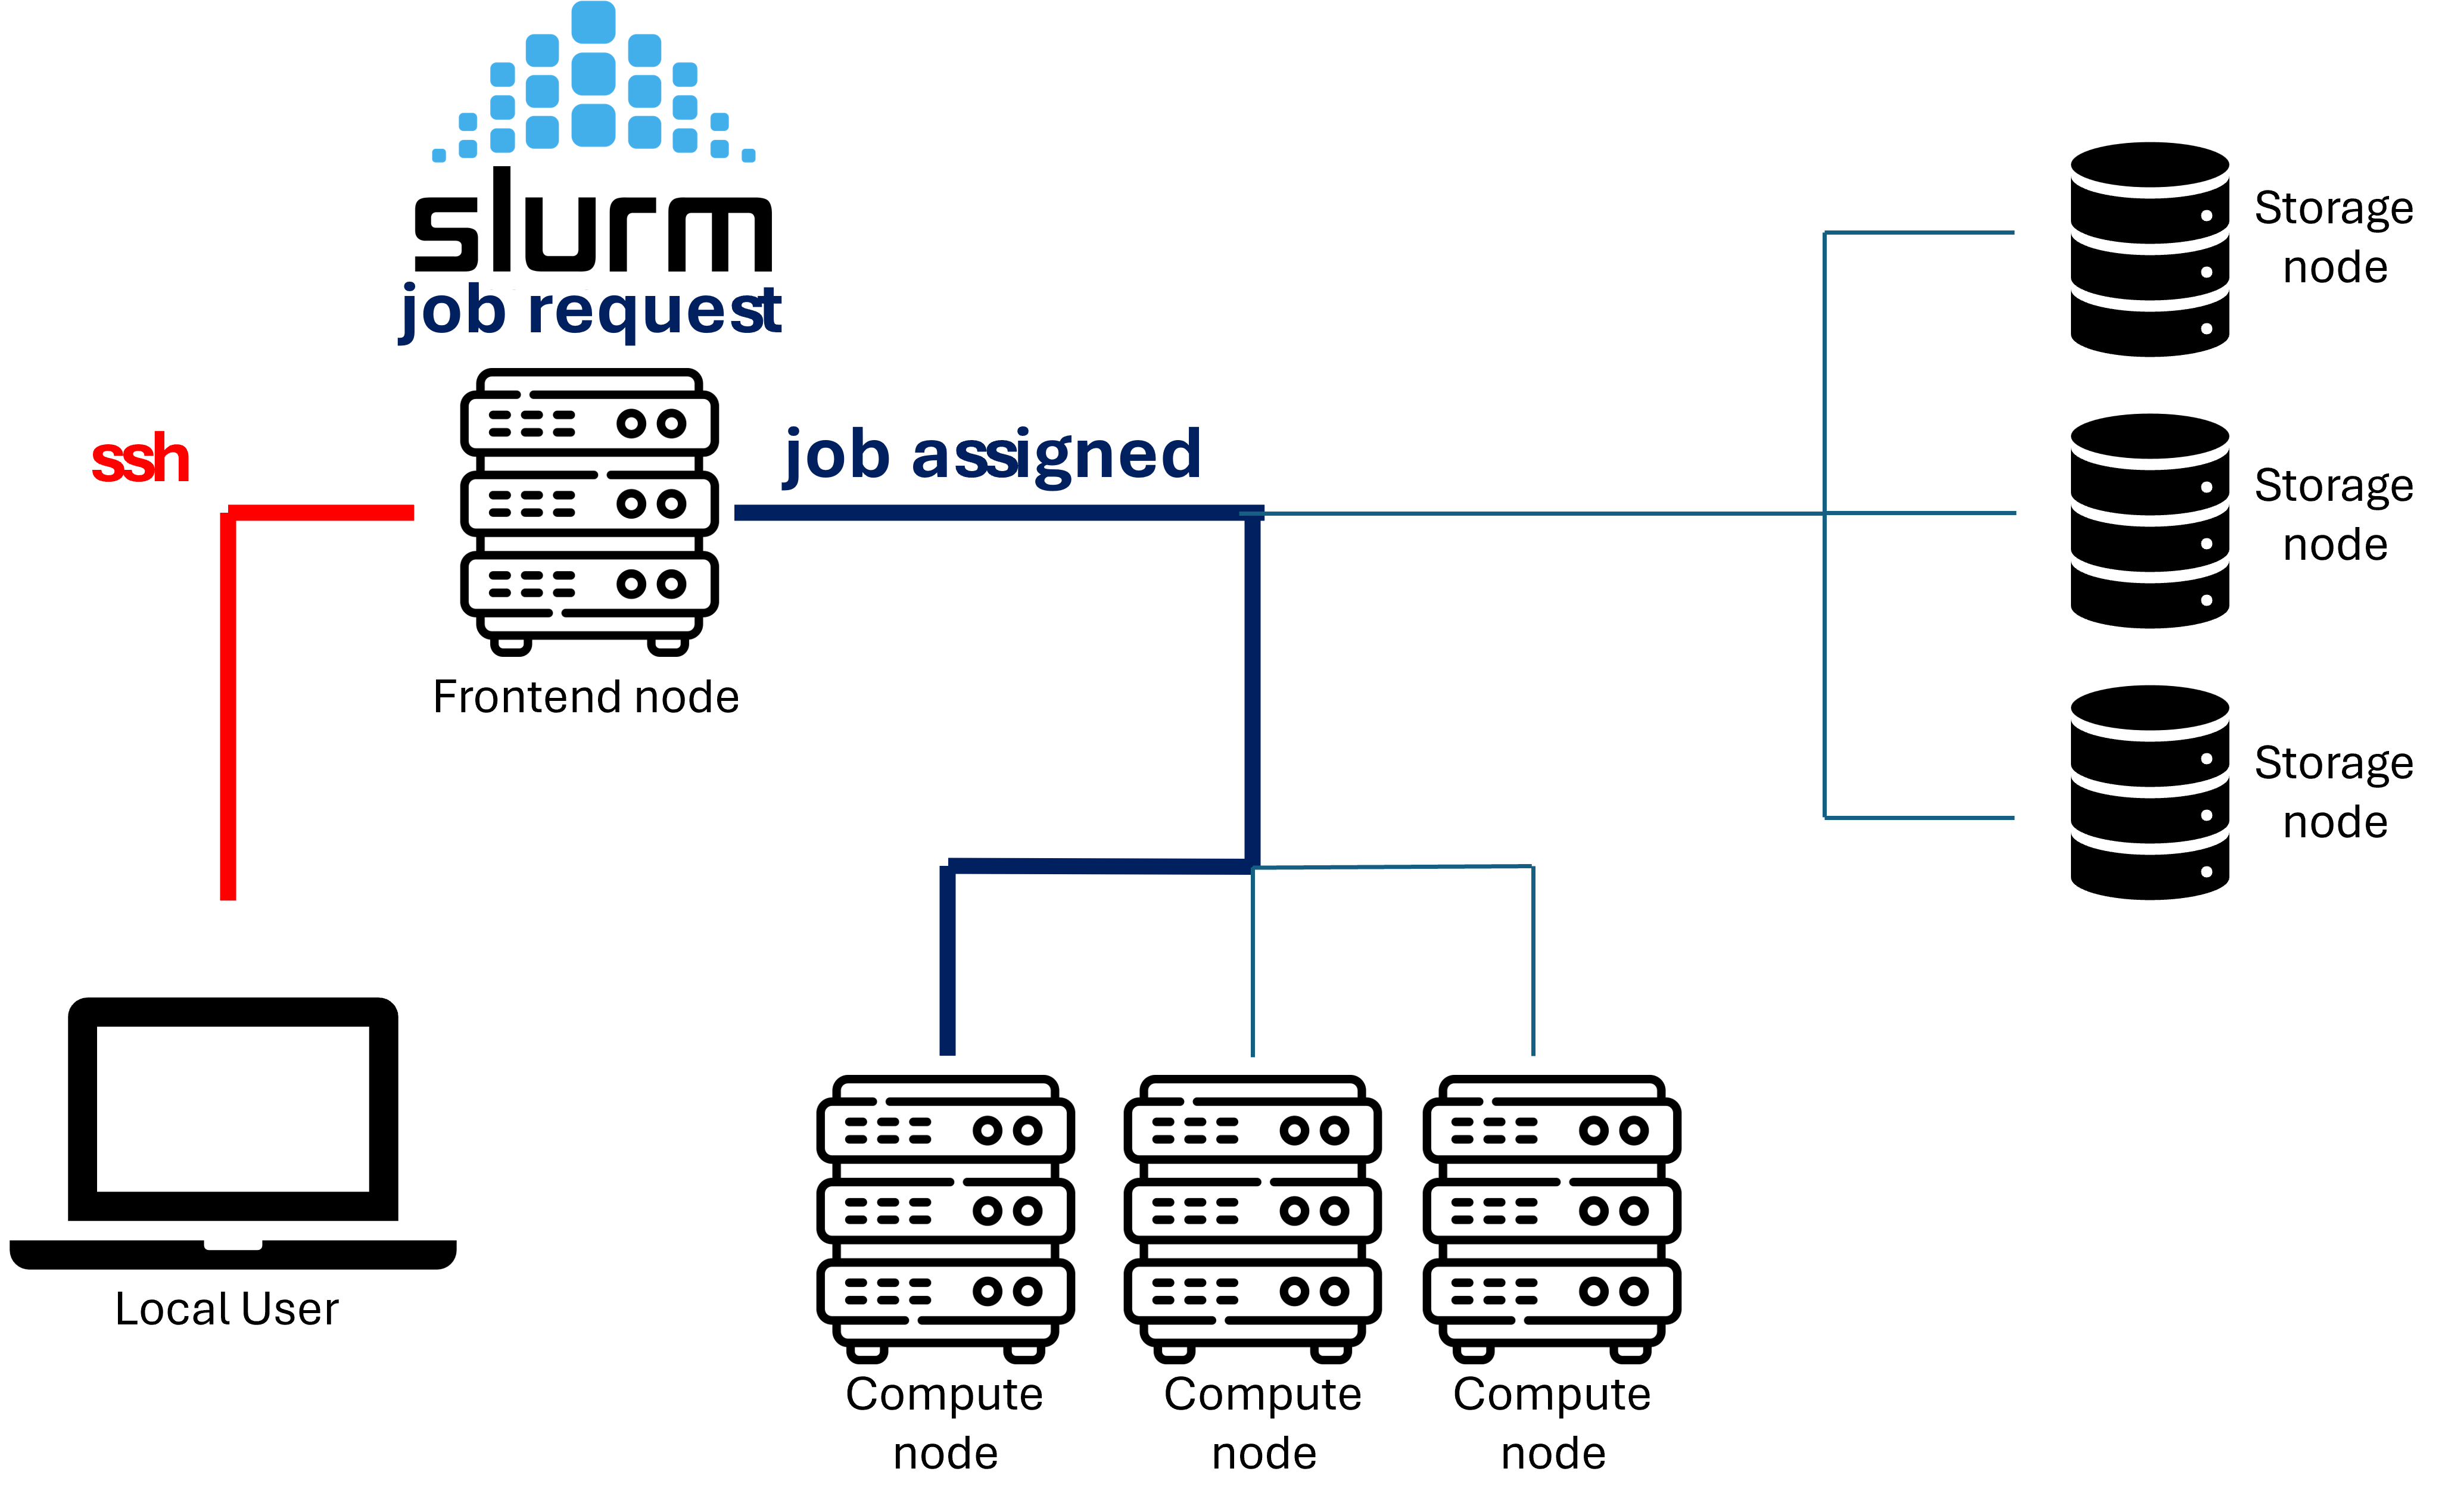
What is a job on a HPC
A computational task executed on requested HPC resources (computing nodes), which are handled by the queueing system (SLURM).
The command gnodes will tell you if there is heavy usage across the computing nodes
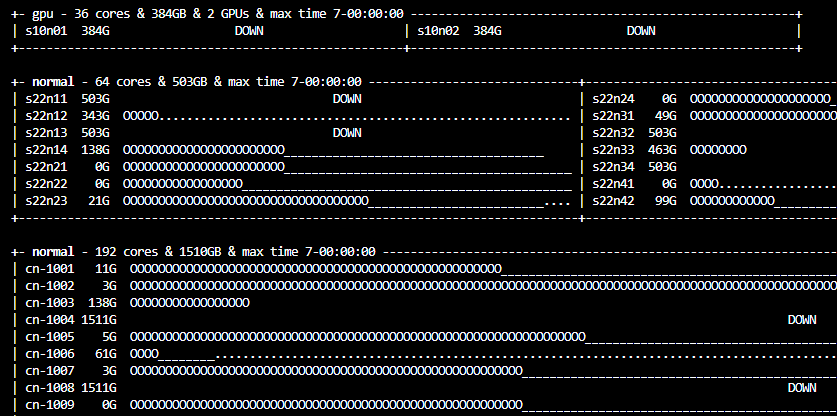
Usage of computing nodes. Each node has a name (e.g. cn-1001). The symbols for each node mean running a program (0), assigned to an user (_) and available (.)
If you want to venture more into checking the queueing status, Moi has done a great interactive script in R Shiny for that.