Build your GitHub Page using Mkdocs
Install MkDocs and MkDocs extensions using the command line. Additional extensions are optional but can be useful if you choose this approach.
pip install mkdocs # create webpages
pip install mkdocs-material # customize webpages
pip install mkdocs-video # add videos or embed videos from other sources
pip install mkdocs-minify-plugin # Minimize html code
pip install mkdocs-git-revision-date-localized-plugin # display last updated date
pip install mkdocs-jupyter # include Jupyter notebooks
pip install mkdocs-bibtex # add references in your text (`.bib`)
pip install neoteroi-mkdocs # create author cards
pip install mkdocs-table-reader-plugin # embed tabular format files (`.tsv`)Configure your main GitHub Page and its repo
The first step is to set up the main GitHub Page site and the repository that will host it. This is very simple, as you will only need to follow these steps. In a Markdown document, outline the primary objectives of the organization and provide an overview of ongoing research projects. After you have created the organization/usernamegithub.io, it is time to configure your
Projectrepository webpage using MkDocs!Start a new project from Cookiecutter or use one from the previous exercise.
If you use a
Projectrepo from the first exercise, go to the next paragraph. Using Cookiecutter, create a new data analysis project. Remember to fill up your metadata and description files! After you have created the folder, it would be best to initialize a Git repo following the instructions from the previous section.Next, link your data of interest (or create a small fake dataset) and make an example of a data analysis notebook/report (this could be just a scatter plot of a random matrix of values). Depending on your setup, you might be using Jupyter Notebooks or R Markdown files. The extensions that we have installed using
pipallow you to directly add a Jupyter Notebook file to themkdocs.ymlnavigation section. On the other hand, if you are using R Markdown files, you will have to knit your document into either an HTML page or a GitHub document.For the purposes of this exercise, we have already included a basic
index.mdmarkdown file that can serve as the intro page of your repo, and ajupyter_example.ipynbwith some code in it. You are welcome to modify them further to test them out!Use MkDocs to create your webpage
When you are happy with your files and are ready to publish them, make sure to add, commit, and push the changes to the remote. Then, build up your webpage using MkDocs and the
mkdocs gh-deploycommand from the same directory where themkdocs.ymlfile is. For example, if yourmkdocs.ymlfor yourProjectfolder is in/Users/JARH/Projects/project1_JARH_20231010/mkdocs.yml, docd /Users/JARH/Projects/project1_JARH_20231010/and thenmkdocs gh-deploy. This requires a couple of changes in your GitHub organization settings.Remember to make sure that your markdowns, images, reports, etc., are included in the
docsfolder and properly set up in the navigation section of yourmkdocs.ymlfile.Finally, we only need to set up the GitHub
Projectrepo settings.Publishing your GitHub Page
Go to your GitHub repo settings and configure the Page section. Since you are using the
mkdocs gh-deploycommand to publish your site in thegh-pagesbranch (as explained the the mkdocs documentation), we need to change where GitHub is fetching the website. You will need to configure the settings of this repository in GitHub so that the Page is taken from thegh-pagesbranch and therootfolder.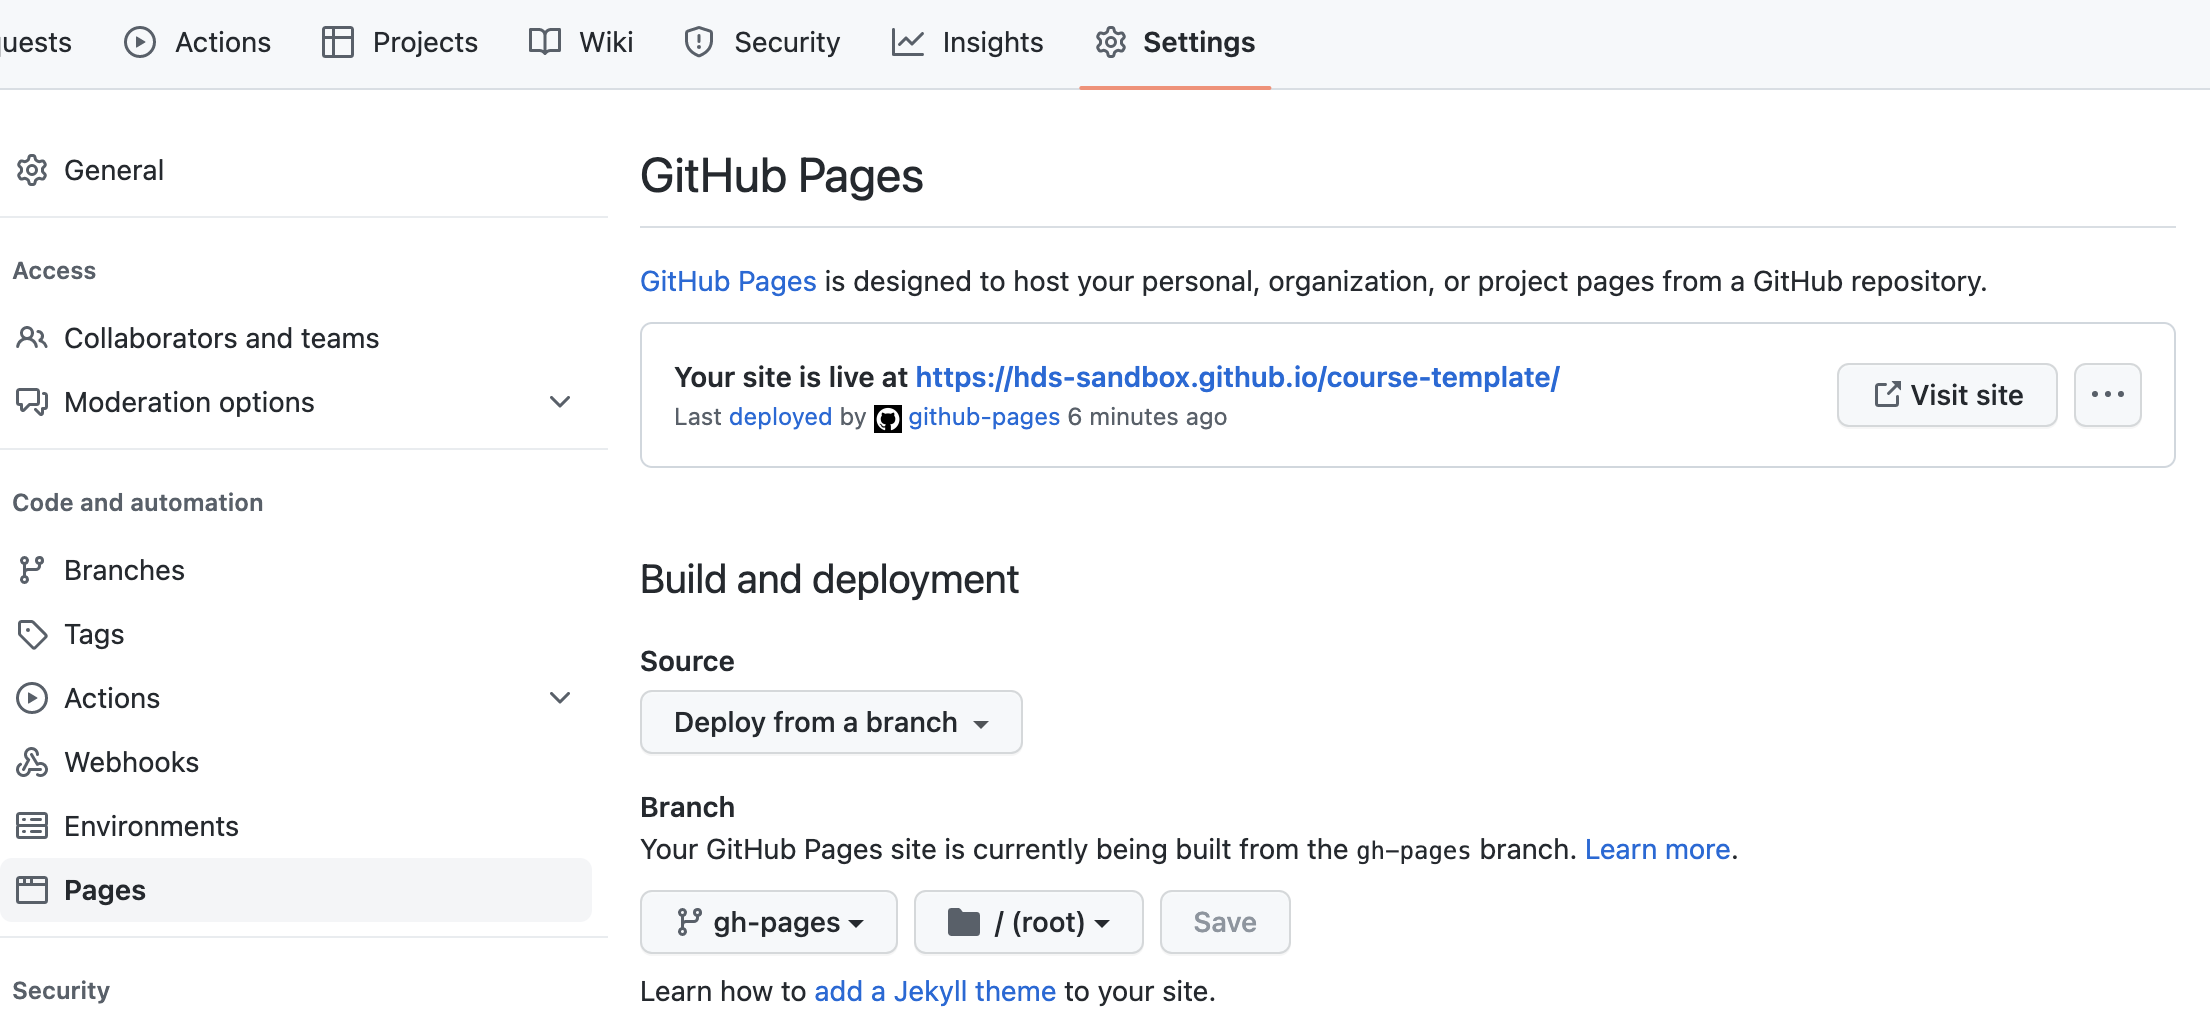
GitHub Pages setup - Branch should be
gh-pages - Folder should be
root
After a couple of minutes, your webpage should be ready! You should be able to see your webpage through the link provided in the Page section!
- Branch should be
Now it is also possible to include this repository webpage in your main webpage <organization>.github.io by including the link of the repo website (https://<organization>.github.io/repo-name) in the navigation section of the mkdocs.yml file in the main organizationgithub.io repo.