Setup guidelines
Here, you’ll find the guidelines for using the “Introduction to GWAS” module from our genomics app, developed by the Health Data Science sandbox. We build our training modules as Docker images for easy deployment and use. This Docker container includes course tutorials, datasets, and tools for research or self-learning. The genomics app consists of several modules, with each course item built on JupyterLab. JupyterLab is a web-based integrated development environment for Jupyter notebooks, code, and data.
UCloud
UCloud is an HPC platform available to researchers and students at Danish universities (via a WAYF university login). It features a user-friendly graphical interface that simplifies project, user, and resource management. UCloud offers access to numerous tools via selectable apps and a variety of flexible compute resources. Check out UCloud’s extensive user docs here. For a more detailed information on navigating UCloud and using our apps, check out the Sandbox guidelines.
If you’ve chosen UCloud as your HPC platform to use the Genomics app, follow the steps below.
Step 1
Log onto UCloud at the address http://cloud.sdu.dk using university credentials.
Step 2
When logged in, choose the project from the dashboard (top-right side) from which you would like to utilize compute resources. Every user has their personal workspace (My workspace). You can also provision your own project (check with your local DeiC office if you’re new to UCloud) or you can be invited to someone else’s project. If you’ve previously selected a project, it will be launched by default. If it’s your first time, you’ll be in your workspace.
Step 3
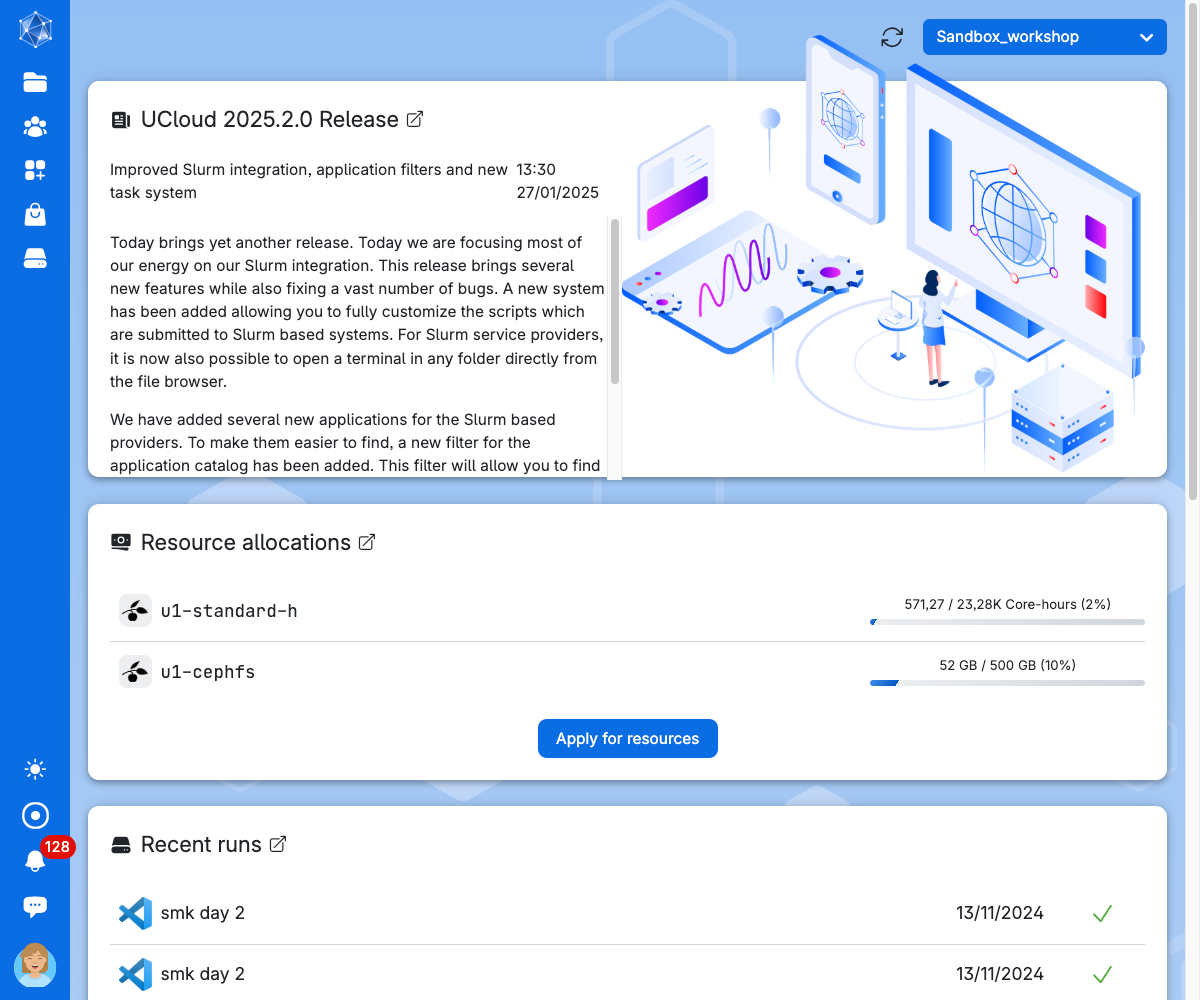
Once approved as a UCloud user, you will be greeted by a dashboard interface. Here, you can view a summary of your workspace, including computing hours, available storage, and other key details. Your current workspace is displayed in the top-right corner (e.g. Sandbox_workshop). On the left side, a toolbar menu provides navigation options. Our Genomic App offers a pre-configured environment with all necessary installations. However, unless you are participating in one of our workshops, you will need to use your own resources to run the training materials.
Step 4
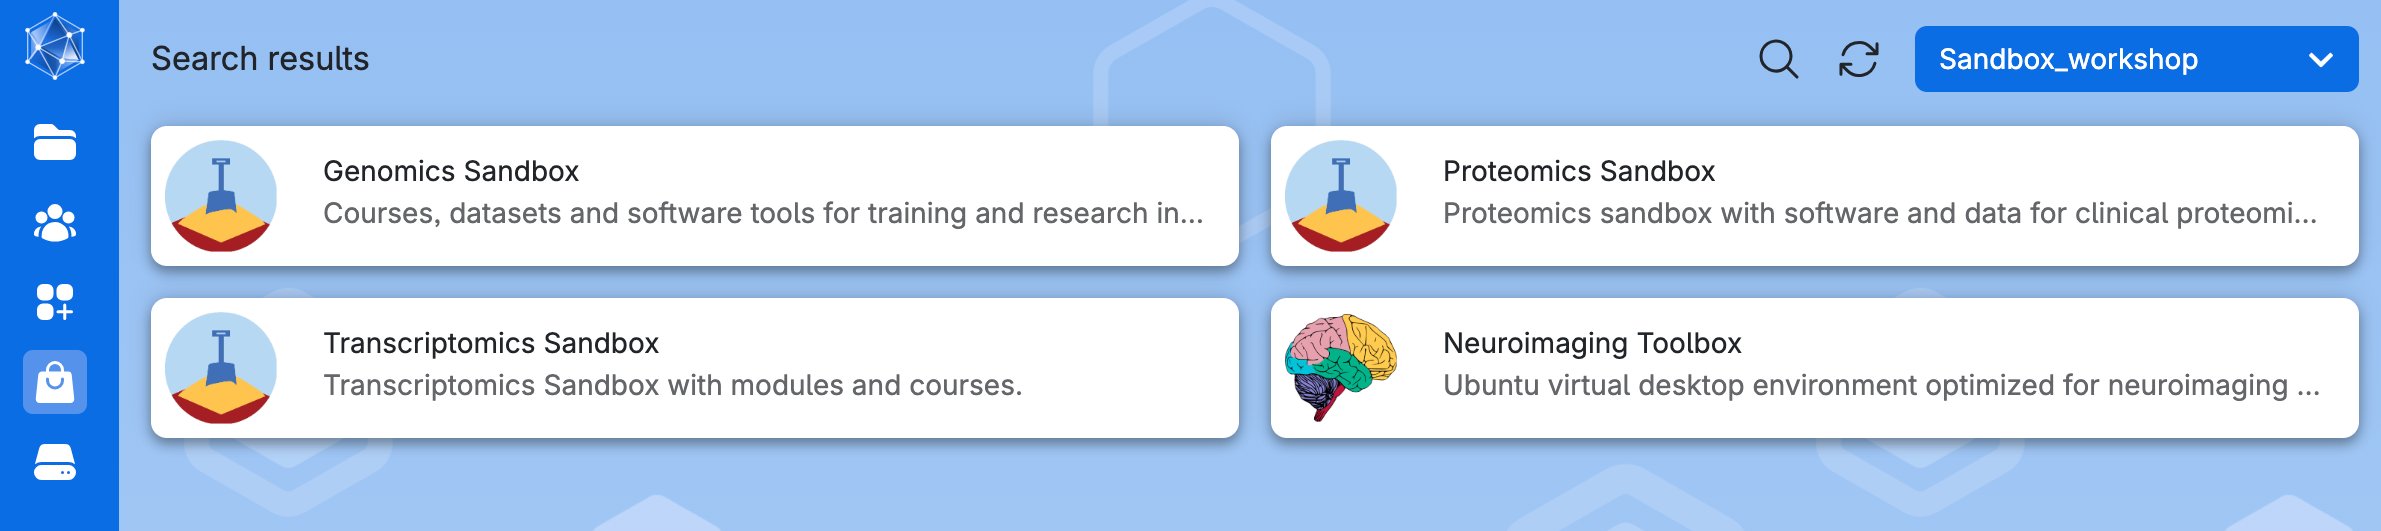
The left-side menu can be used to access the stored data, applications, running programs and settings. Use the Applications symbol (in gray). Search for the Genomics Sandbox application to open its settings.
Step 5
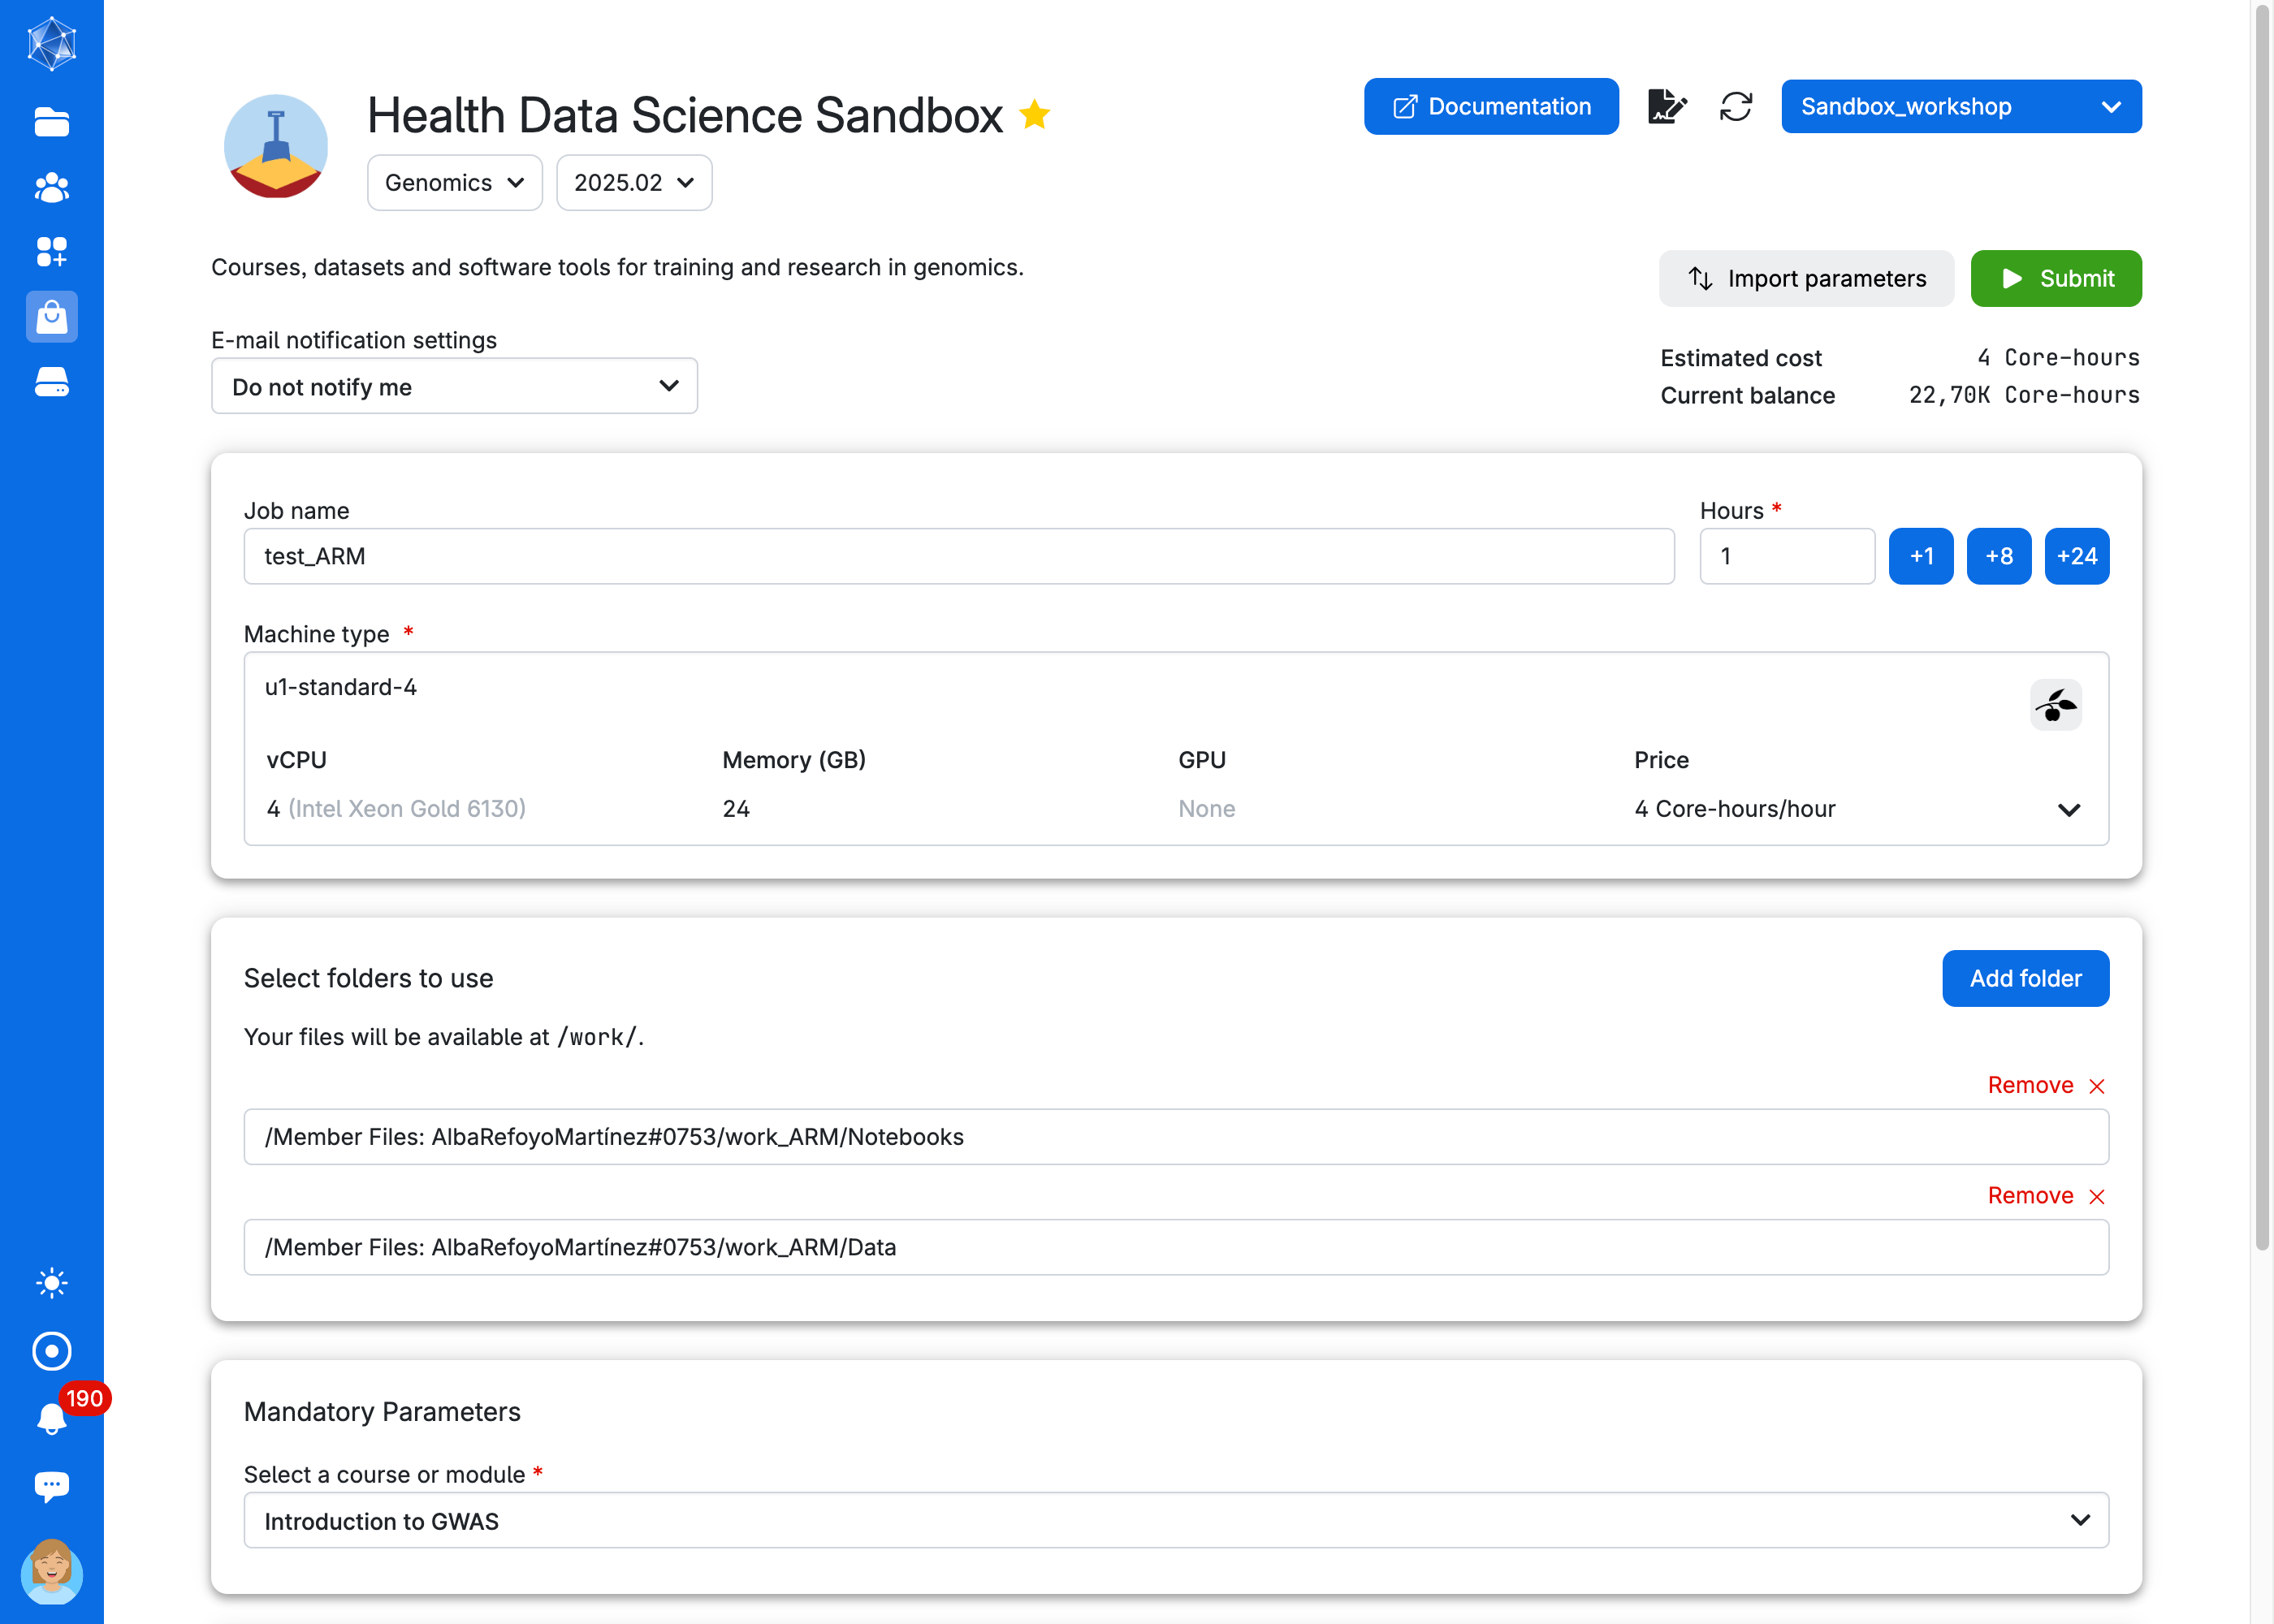
Choose any Job Name (#1 in the figure below), how many hours you want to use for the job (#2, choose at least 2 hours, you can increase this later), and how many CPUs (#3, choose at least 4 CPUs for the first three exercises, but use at least 8 CPUs to run the GWAS analysis). Select the Introduction to GWAS as course (#4). Then click on Submit (#5). The App needs to download data and packages which can take some time. See below how to reuse the data and avoid long waiting time (you need however to download data the first time you run the app).
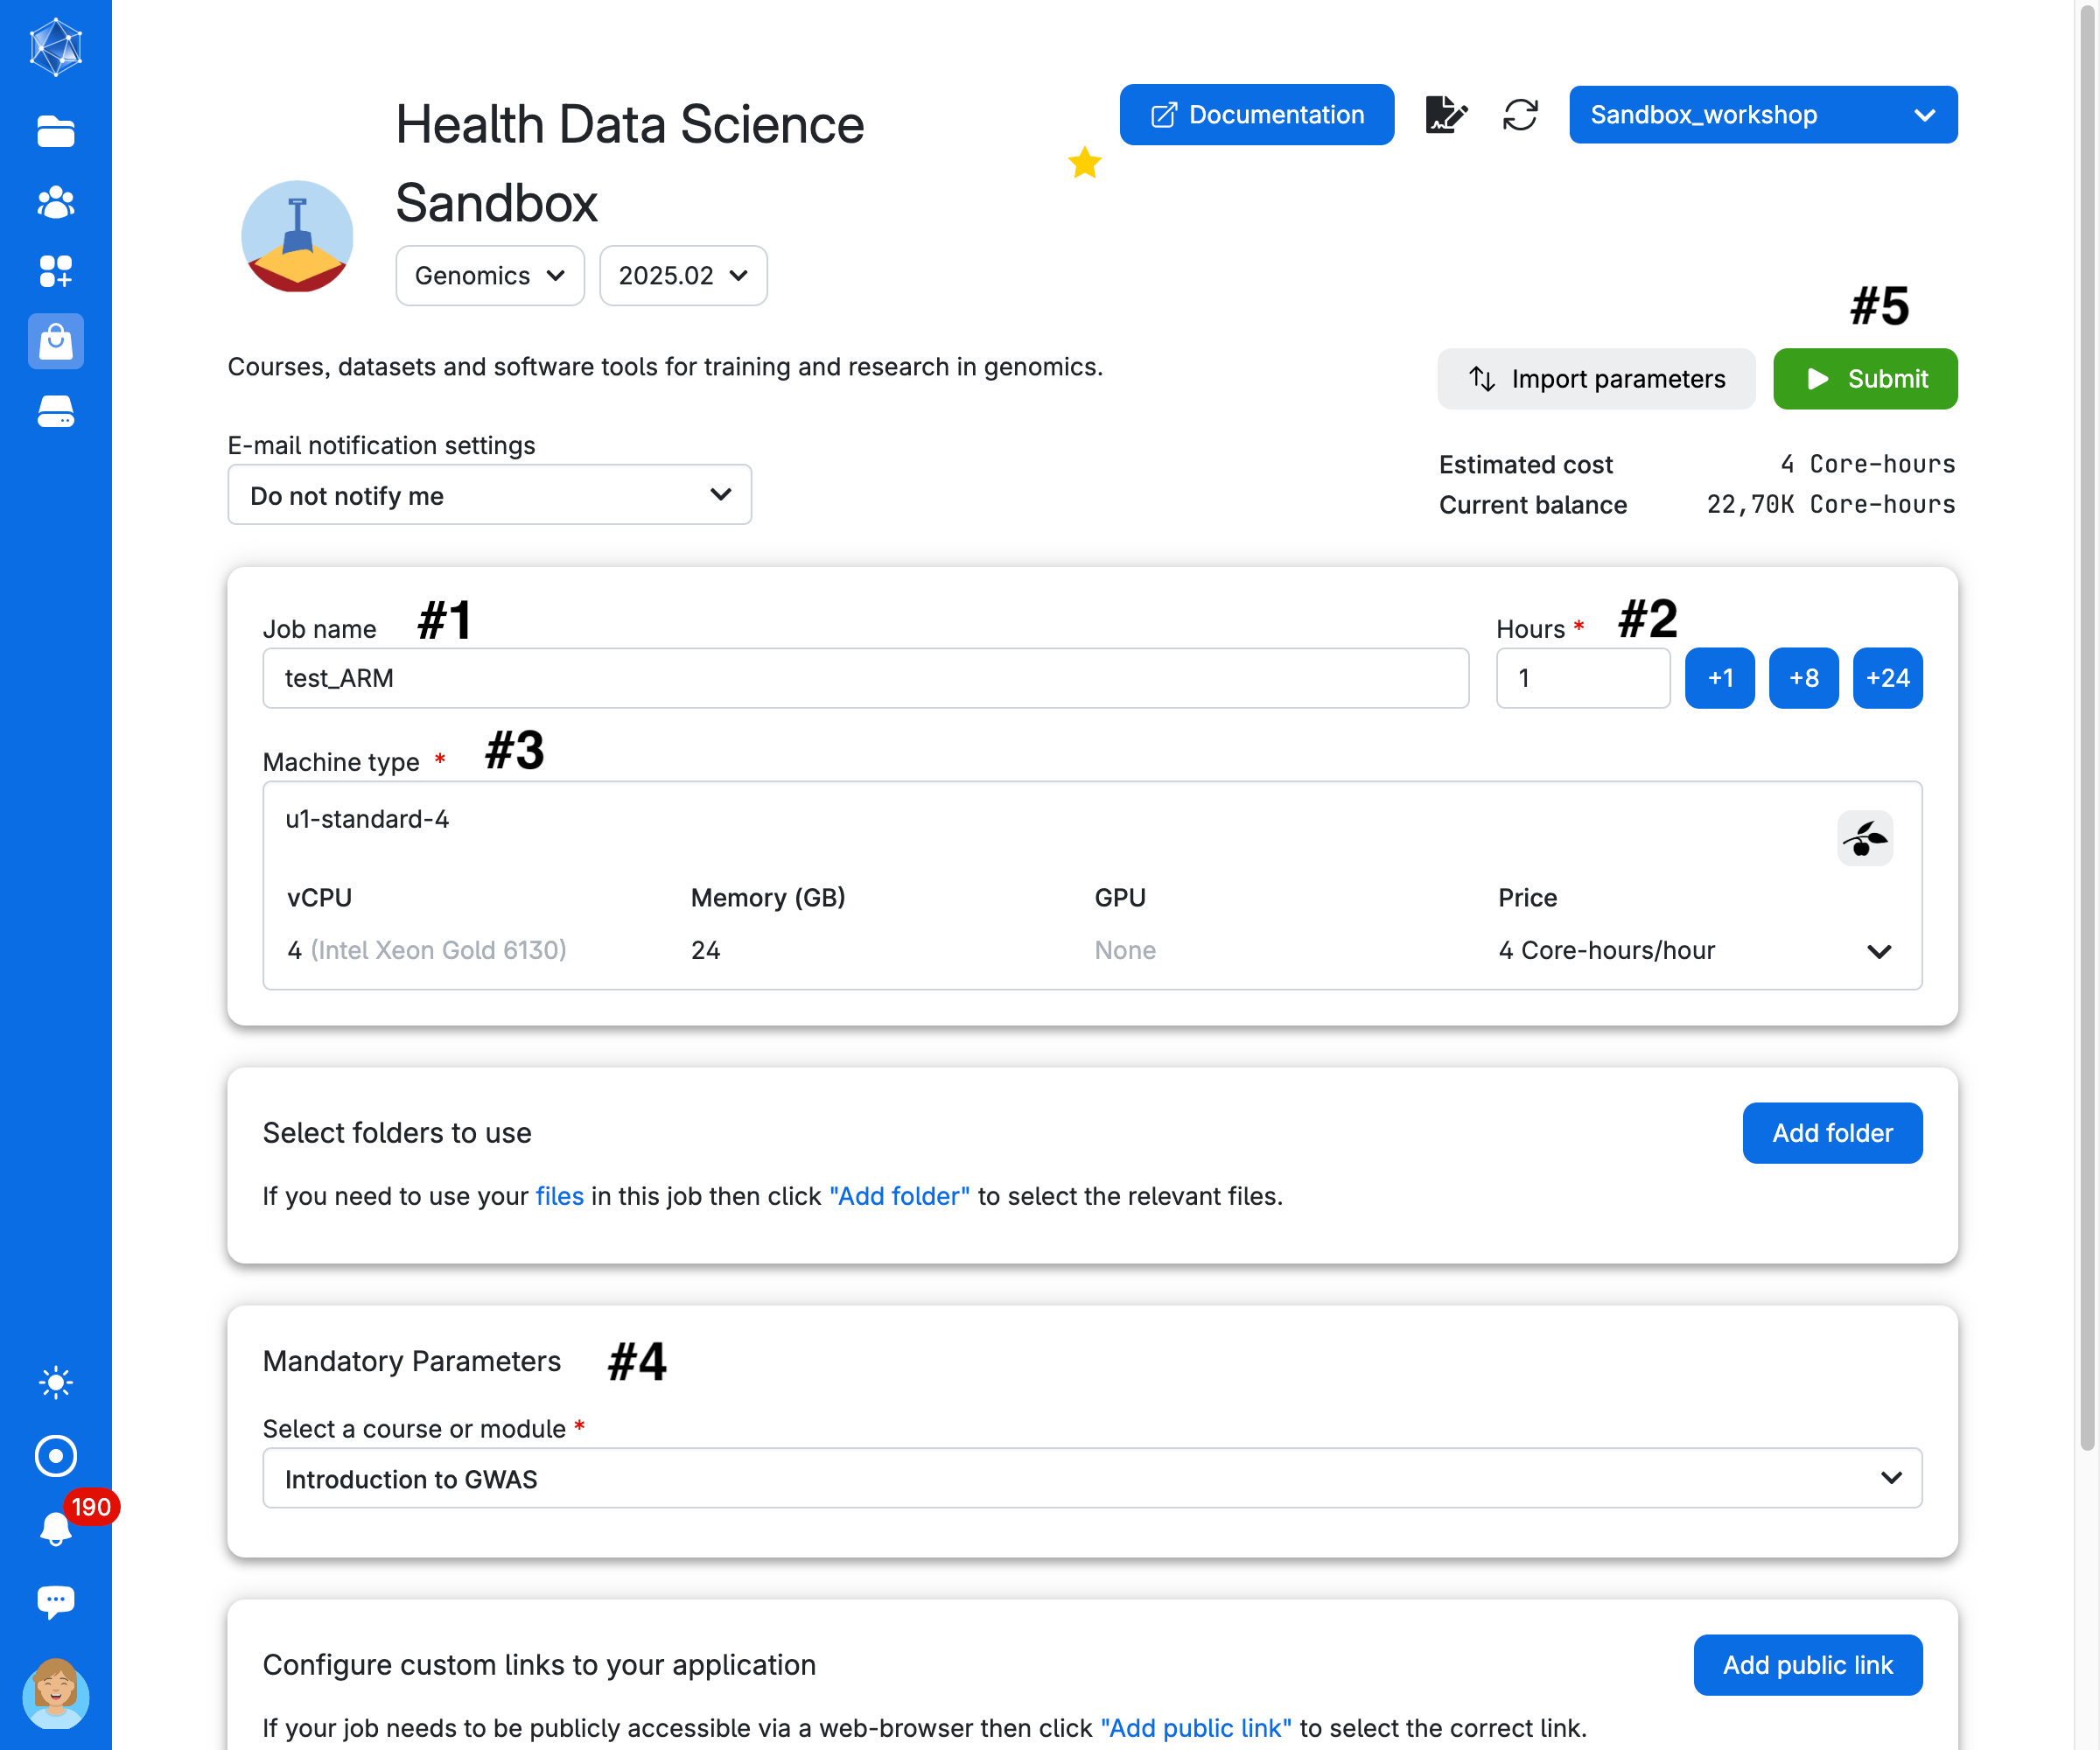
We suggest creating a folder to store your results and any modifications you make to the notebooks. Click on Add folder. For example, work_gwas.
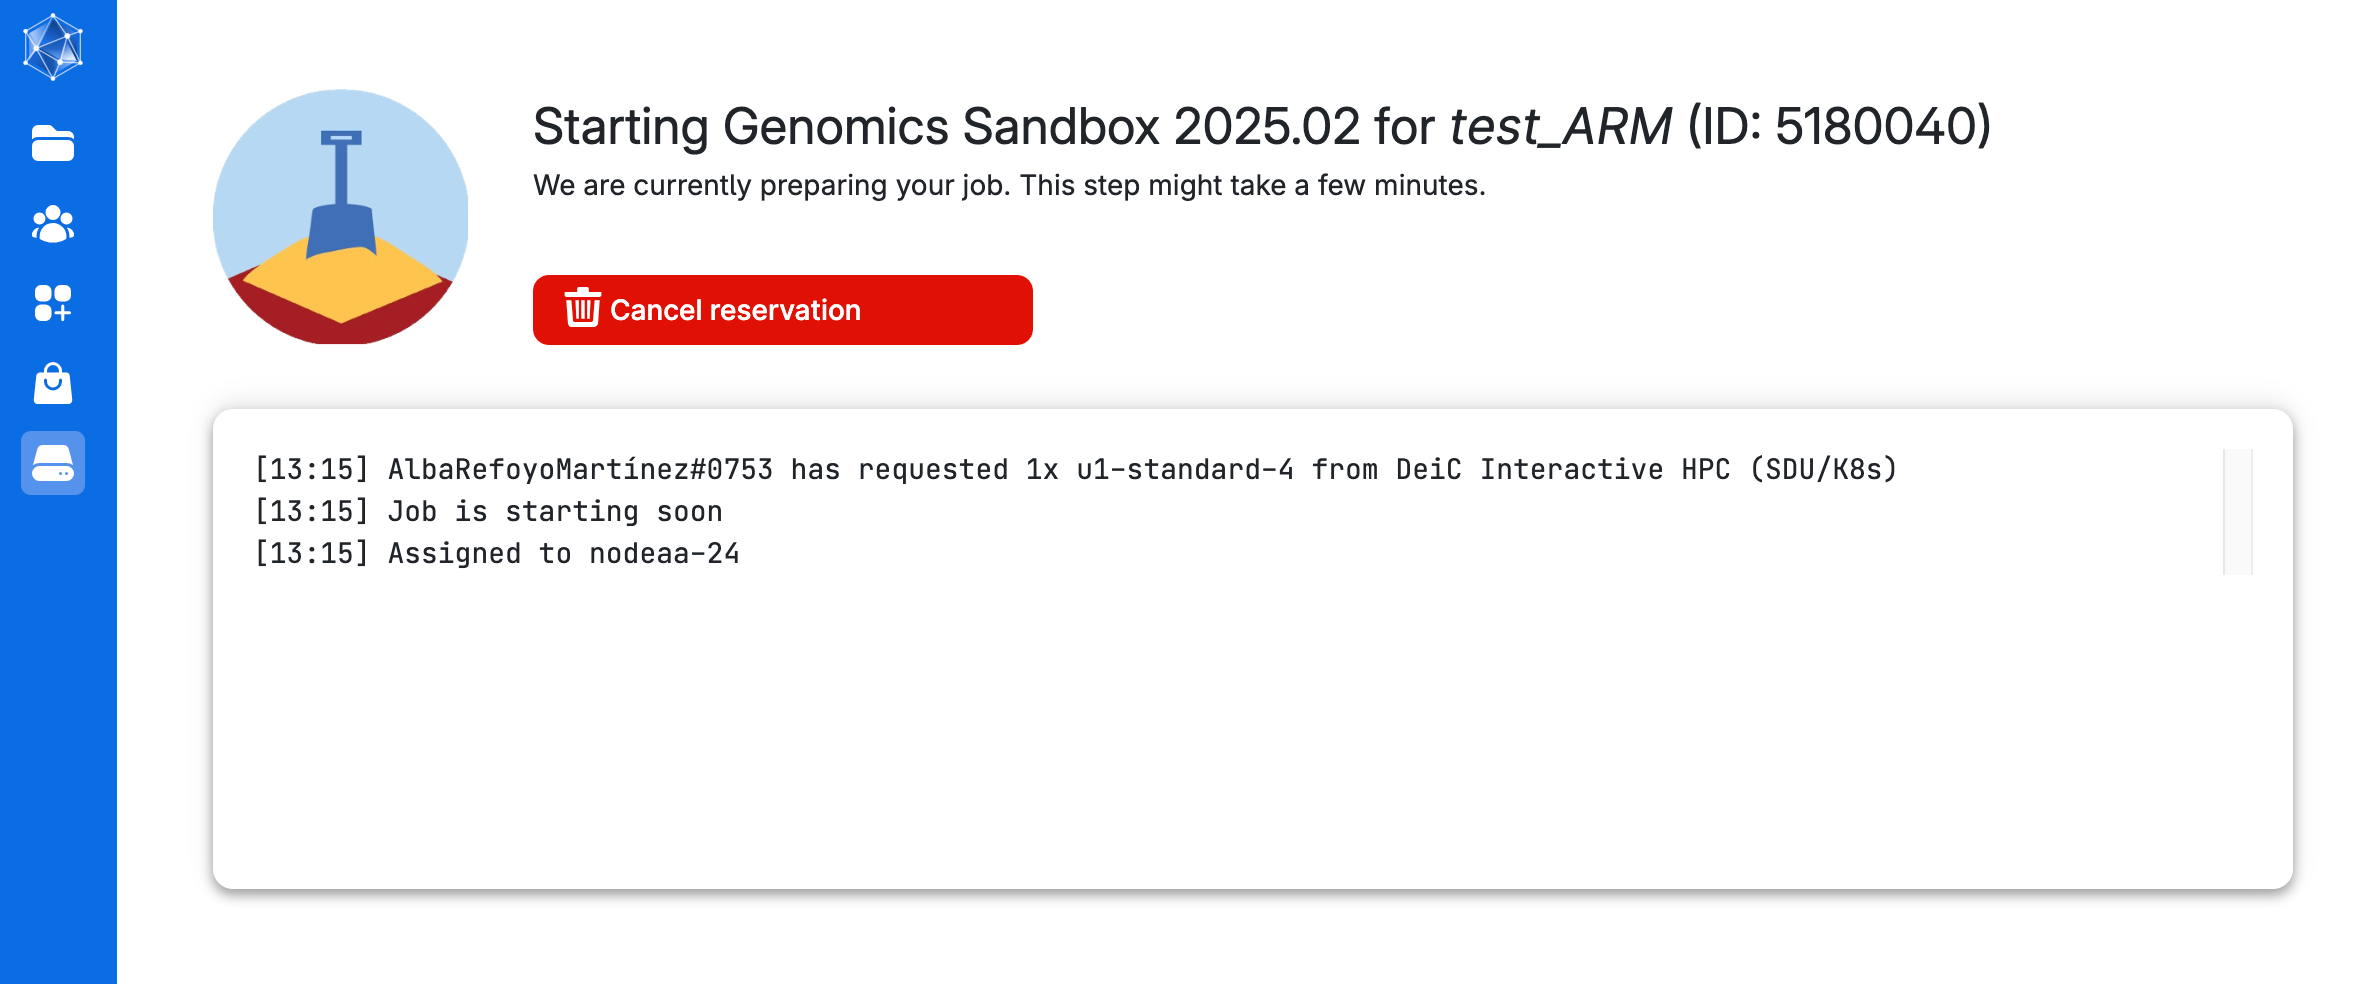
You will be waiting in a queue looking like this:
Step 6
As soon as there are resources, you will have them available, and in a short time the course will be ready to run. The screen you get is in the image below. Here you can increase the number of hours you want the session to run (Time allocation), close the session (Stop application) and open the interface for coding (Open interface)
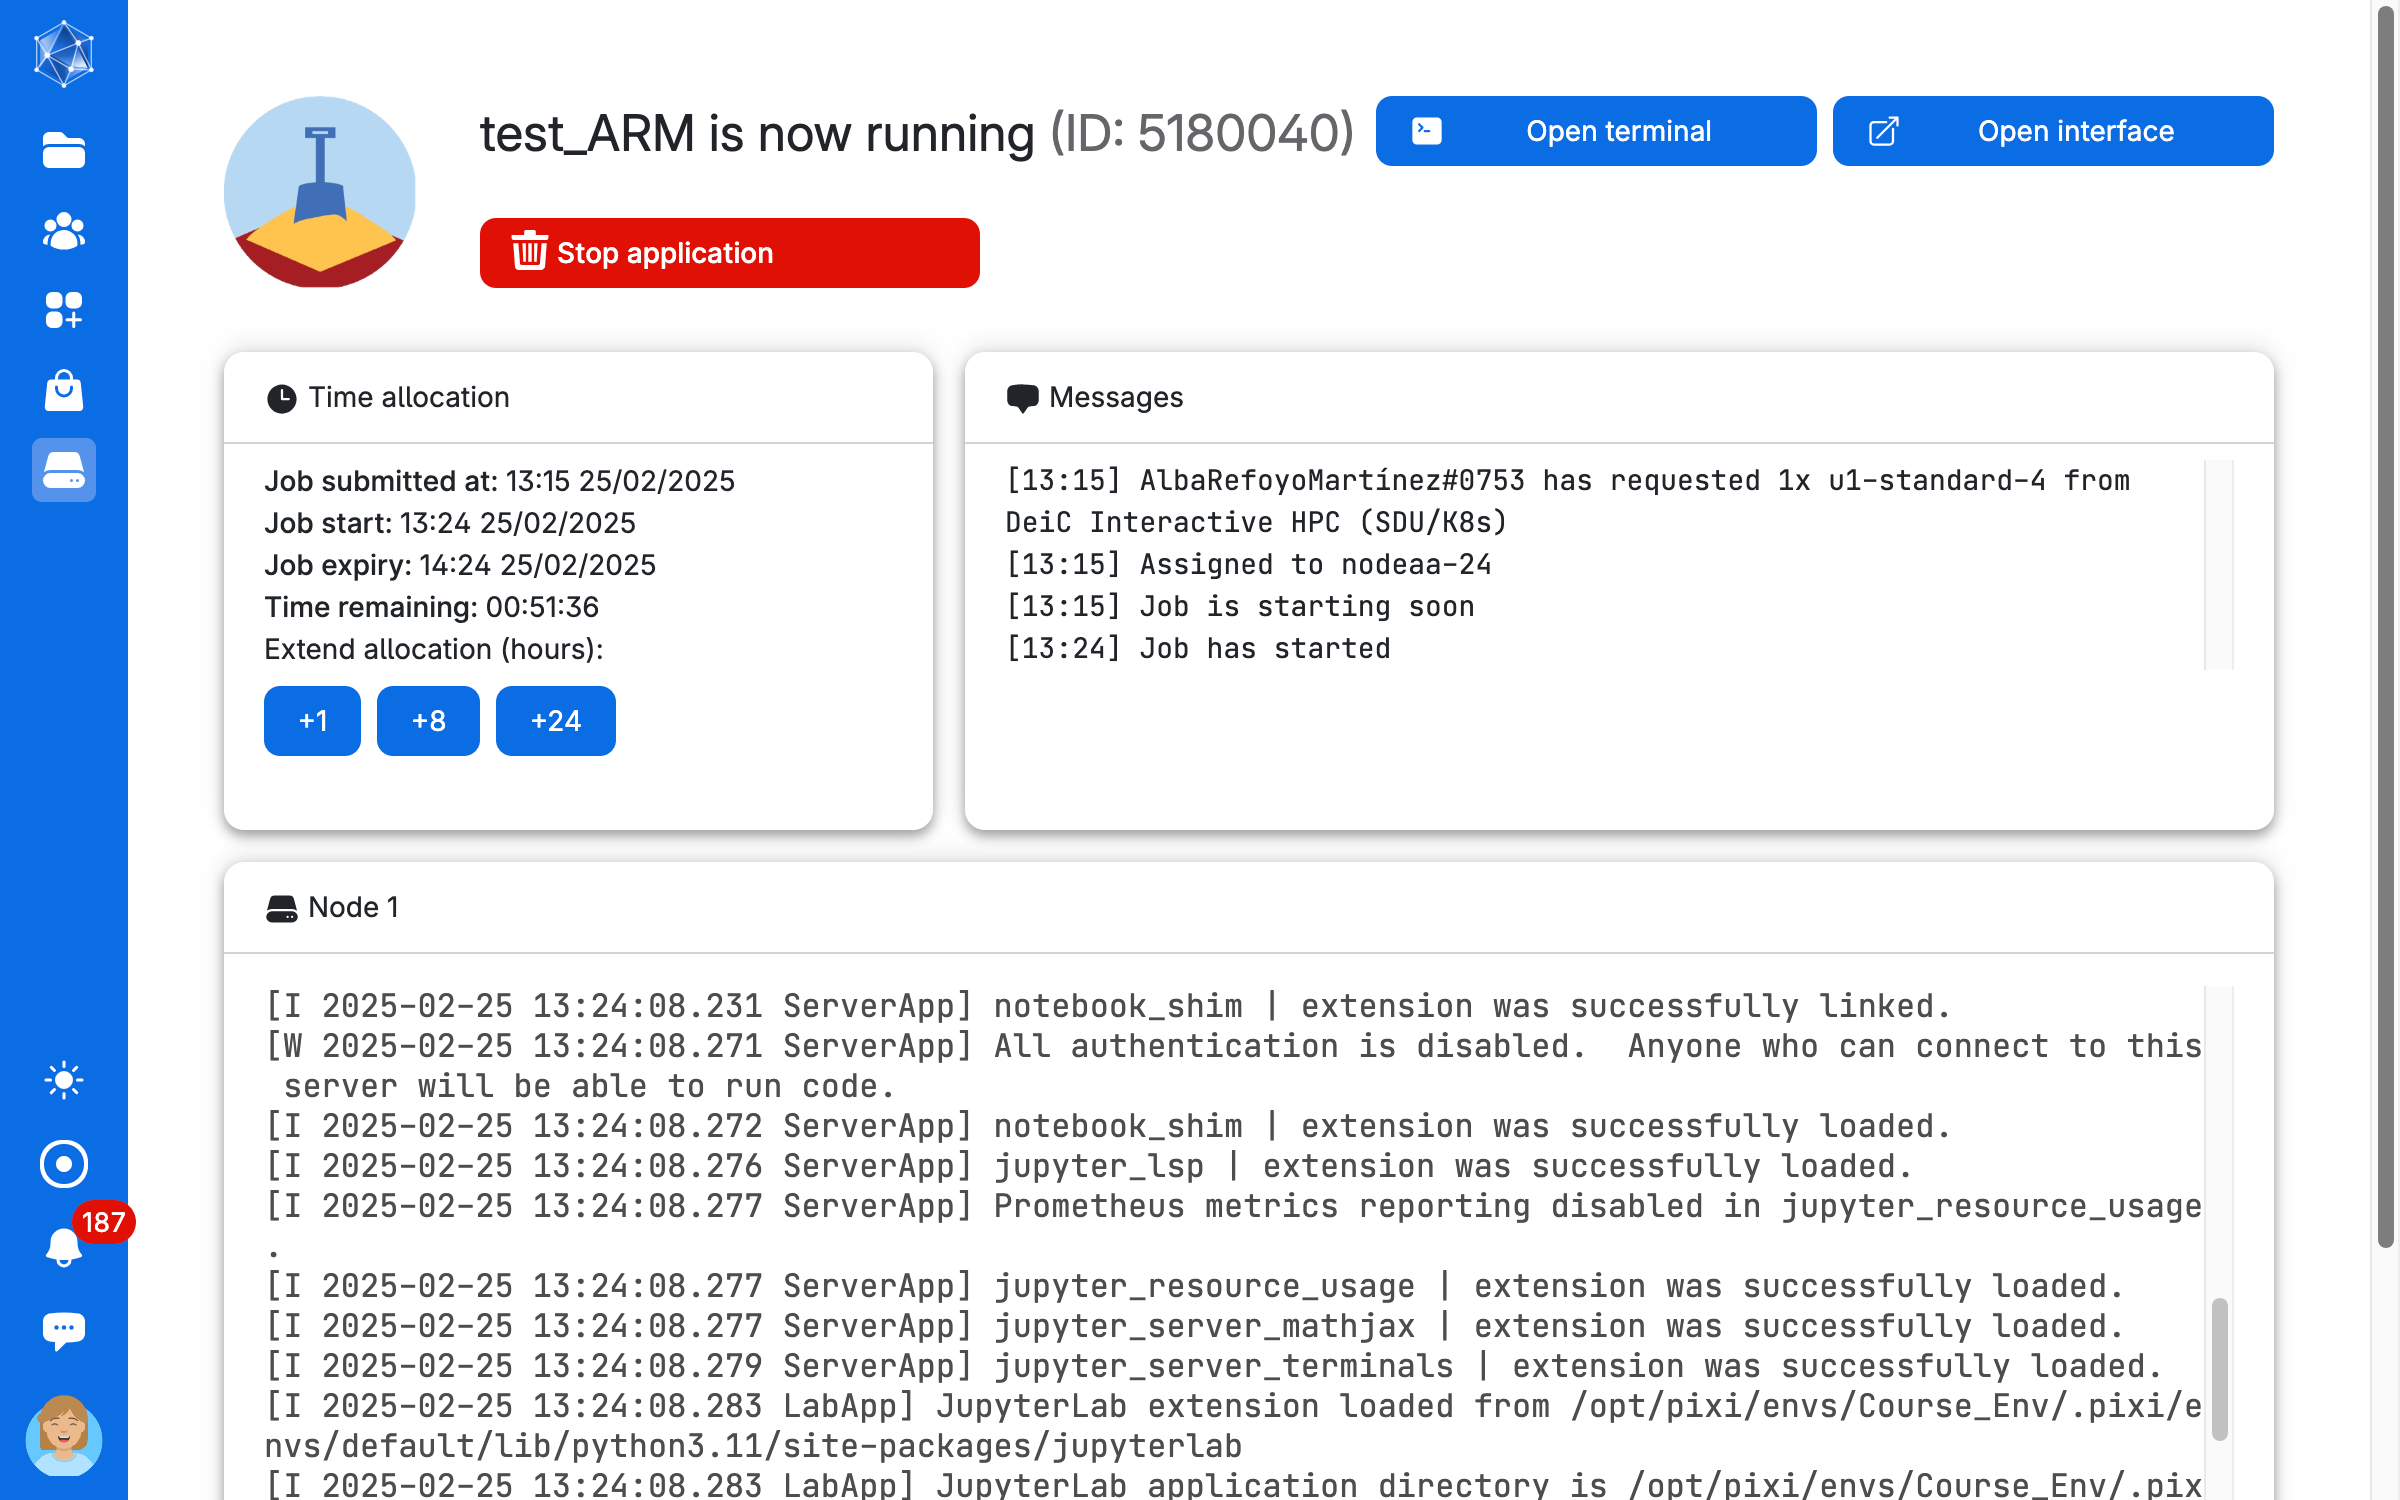
Once you open the coding interface, it does not matter if you close the browser tab with the countdown timer. You can always access it again from the toolbar menu of UCloud. Simply click on Jobs and choose your session from the list of running softwares.
Now you’re ready to use JupyterLab for coding!
If you have mounted your own folder, copy both the notebook and the data folder into it before running any cell.
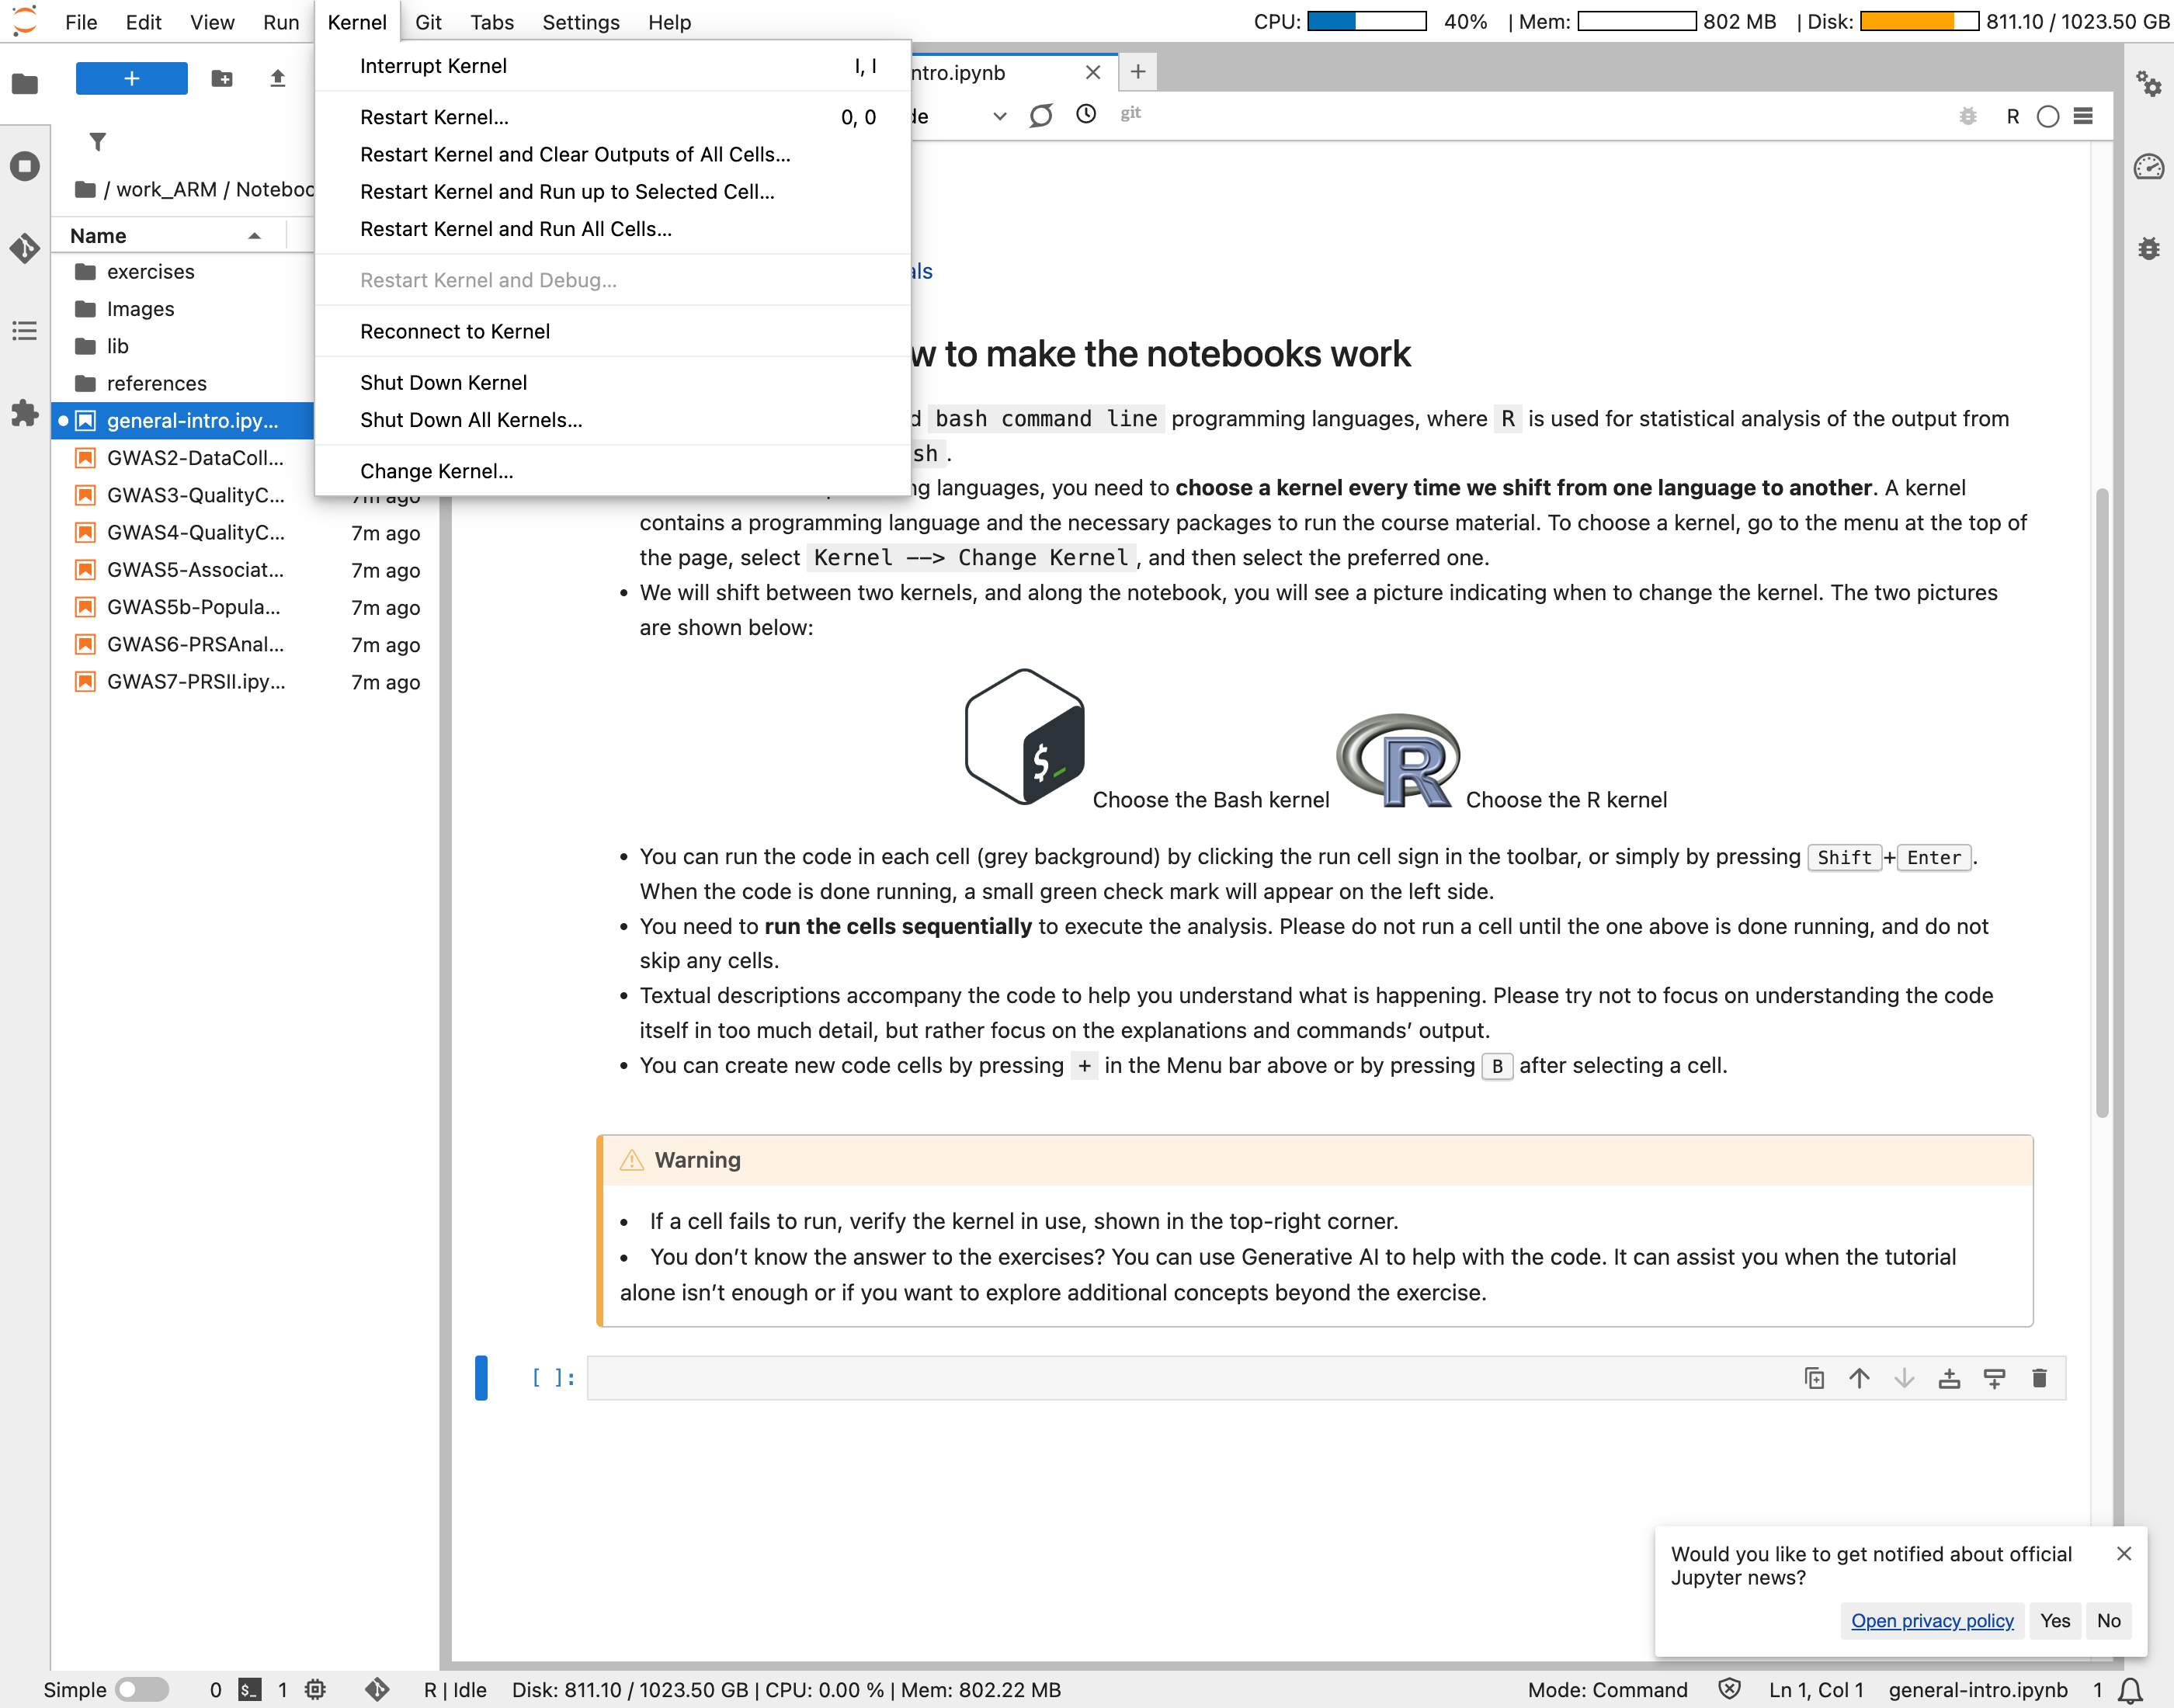
Use the file browser on the left side to locate the Notebooks. Select one of the notebooks—it will open in the right-side panel. Carefully read the instructions and execute each code cell, starting from the first.
Make sure you have selected the correct kernel before running the cells. You’ll see the results appear directly in the notebook!
Recovering the material from your previous session
It would be annoying to start from scratch at each session, with all the analysis to be executed again. You can use data and notebooks running in a previous session of the App. Otherwise, the app will download the data and the notebooks every time. How can we avoid this?
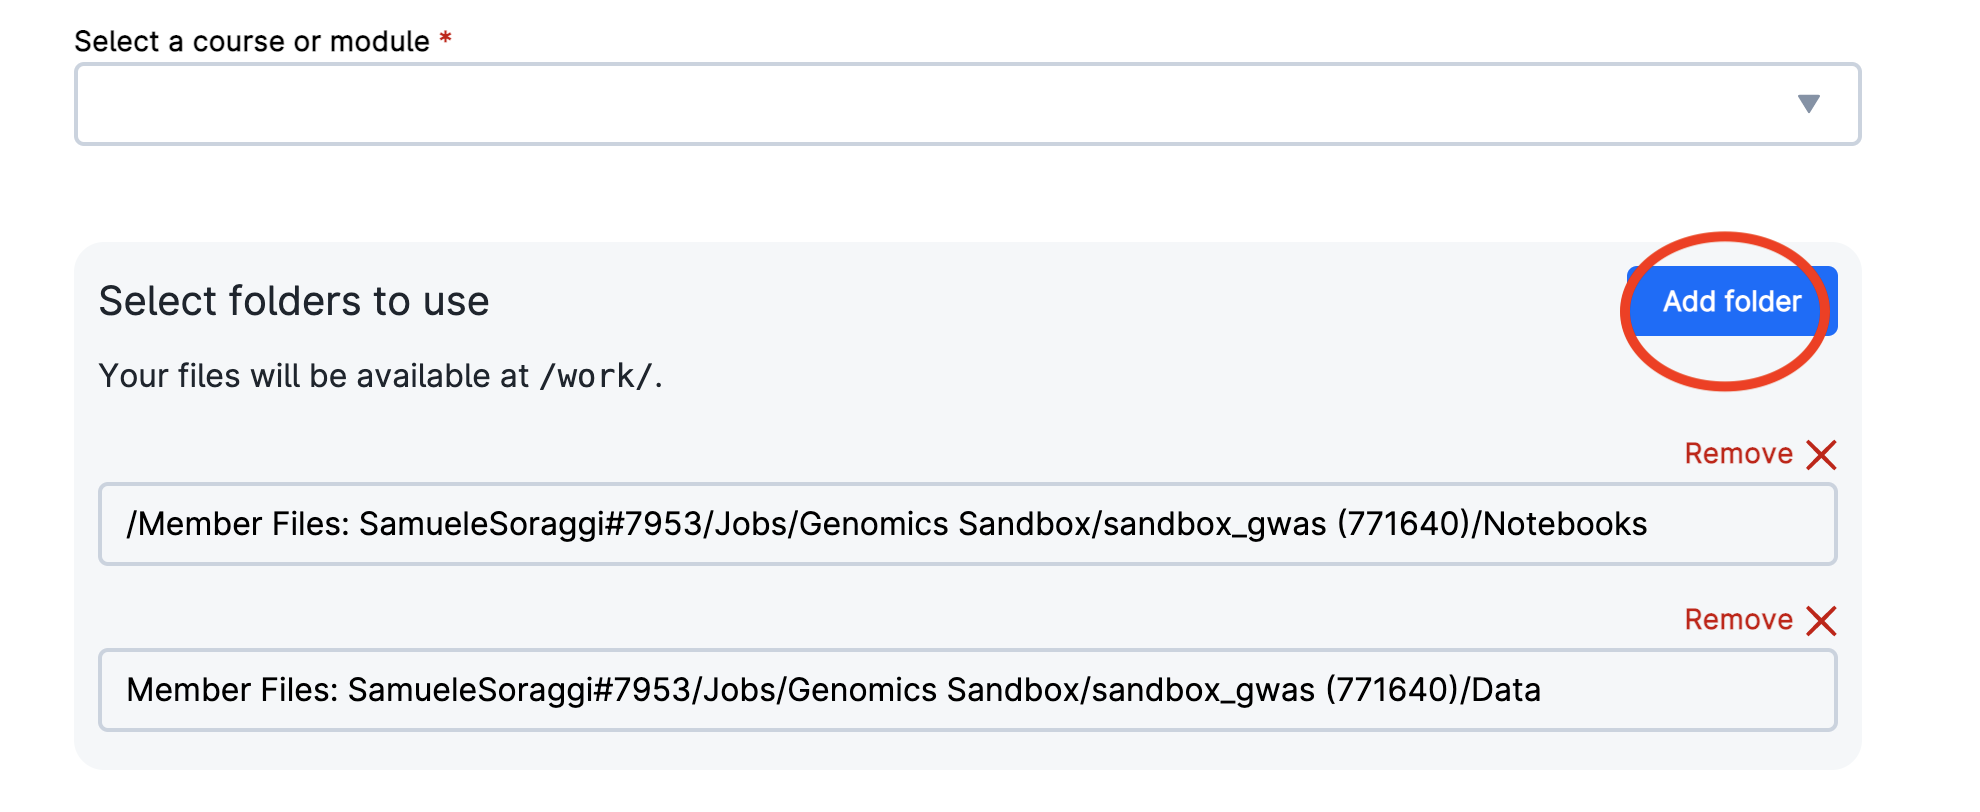
- A. If you copied the folder into your mounted directory, include both folders (“Add folders”) when submitting the job in future runs to maintain your own version of the notebook.
- B. If you didn’t copy the folder, you can still access your version of the notebook. To select data from previous sessions, click “Add folders” and navigate to your latest sandbox session (inside the folder
Jobs/Genomics Sandboxunder your personal user folder as shown below) and select the folders you need. In this example, accepted folders areDataandNotebooks.
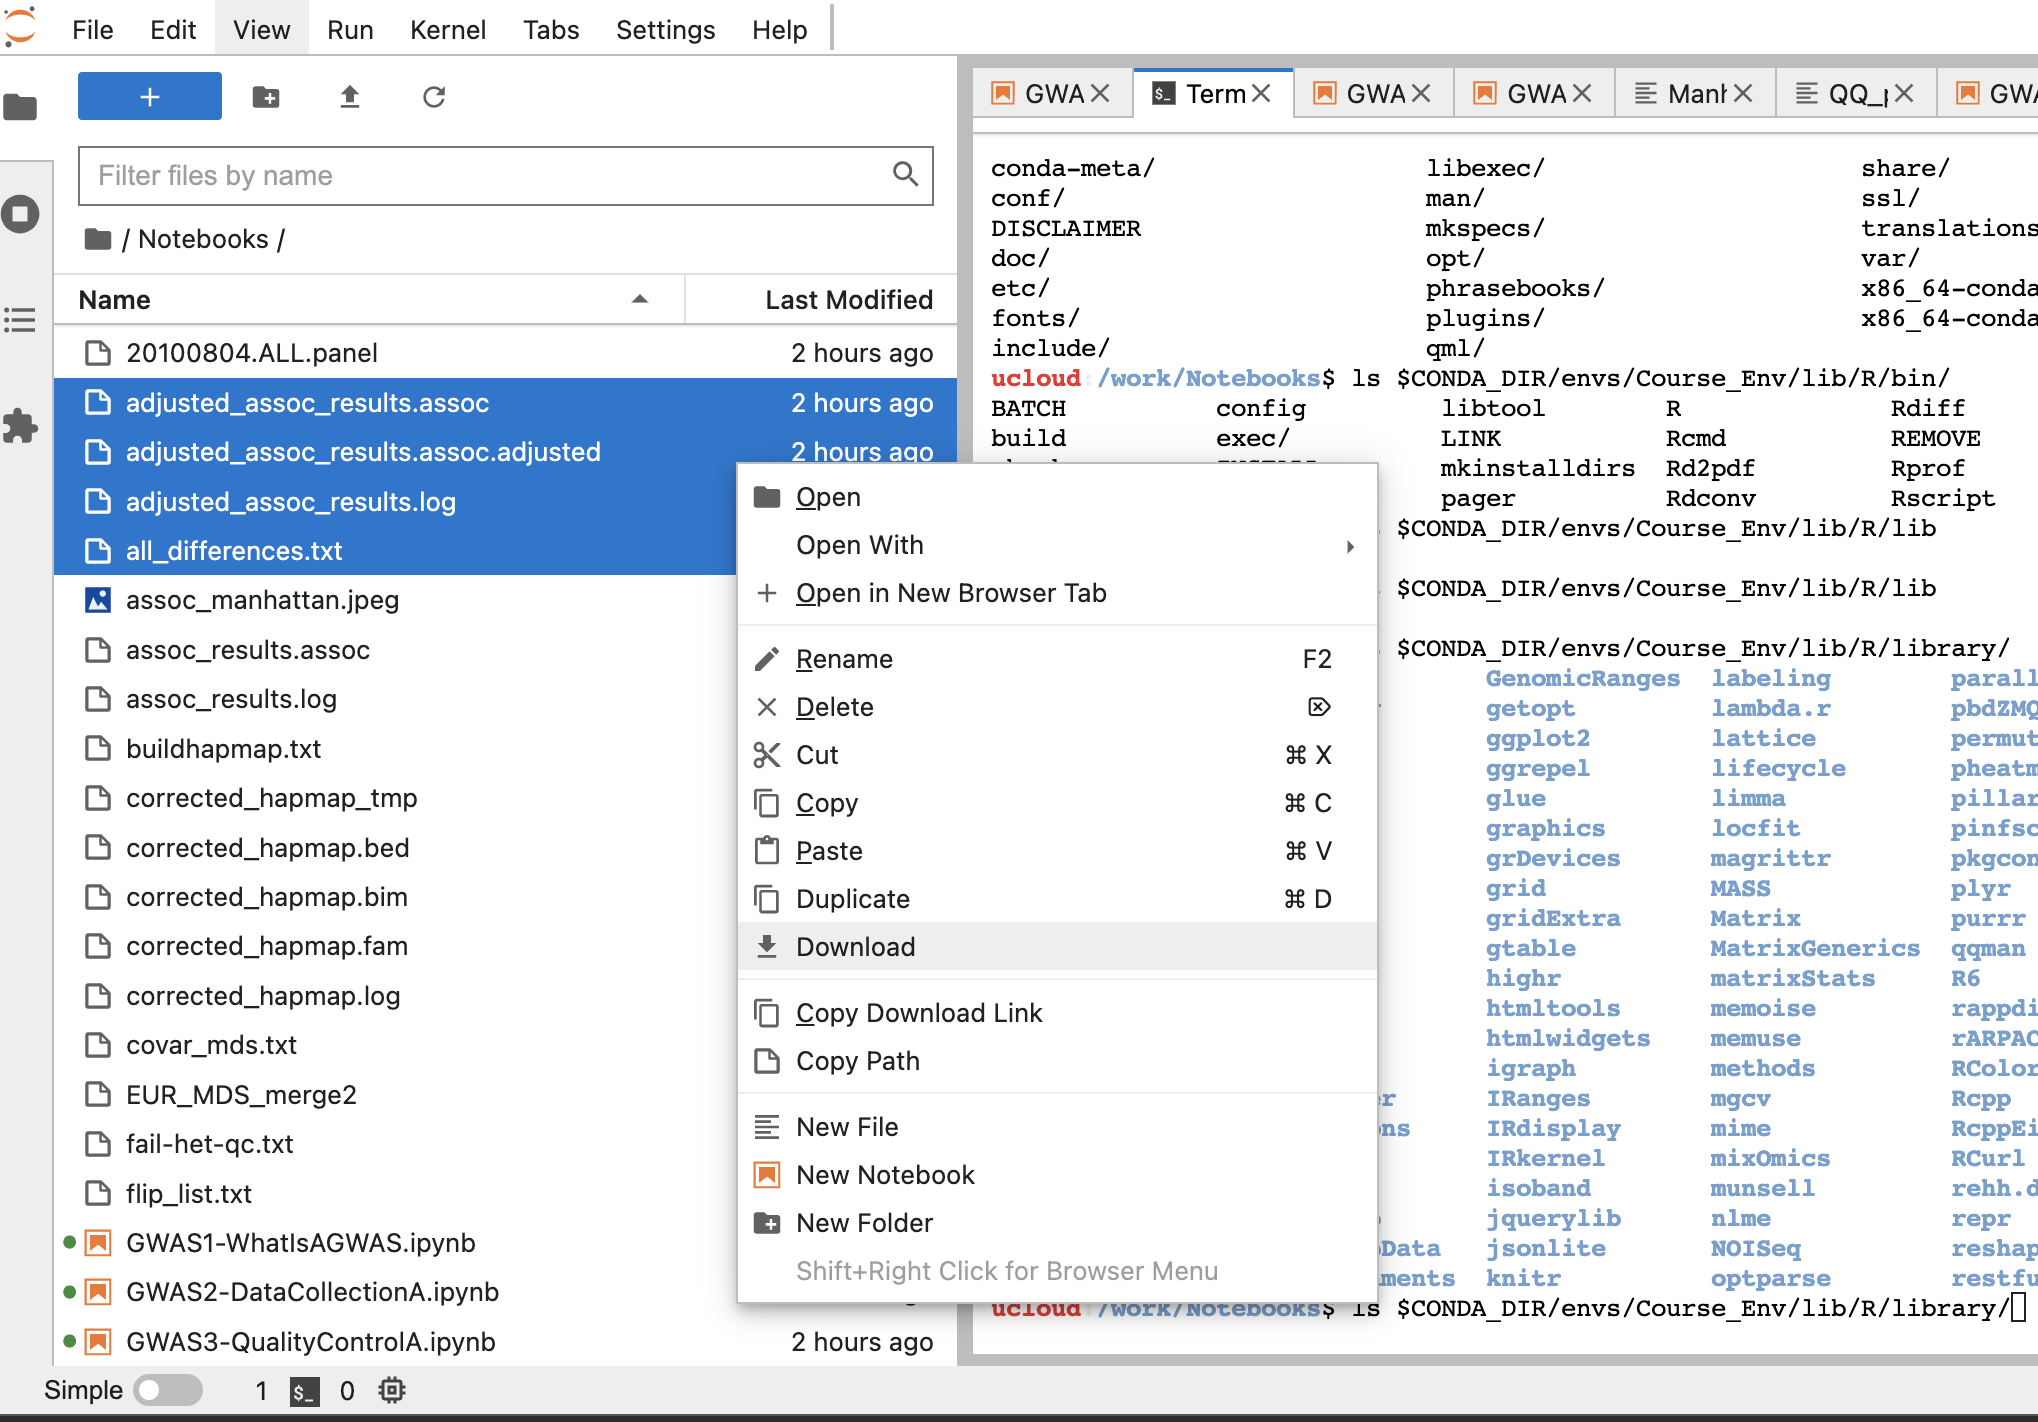
Download the data you generated
You can easily download files you generated by right-clicking on selected files in the browser of Jupyterlab, and by choosing download (see figure below).
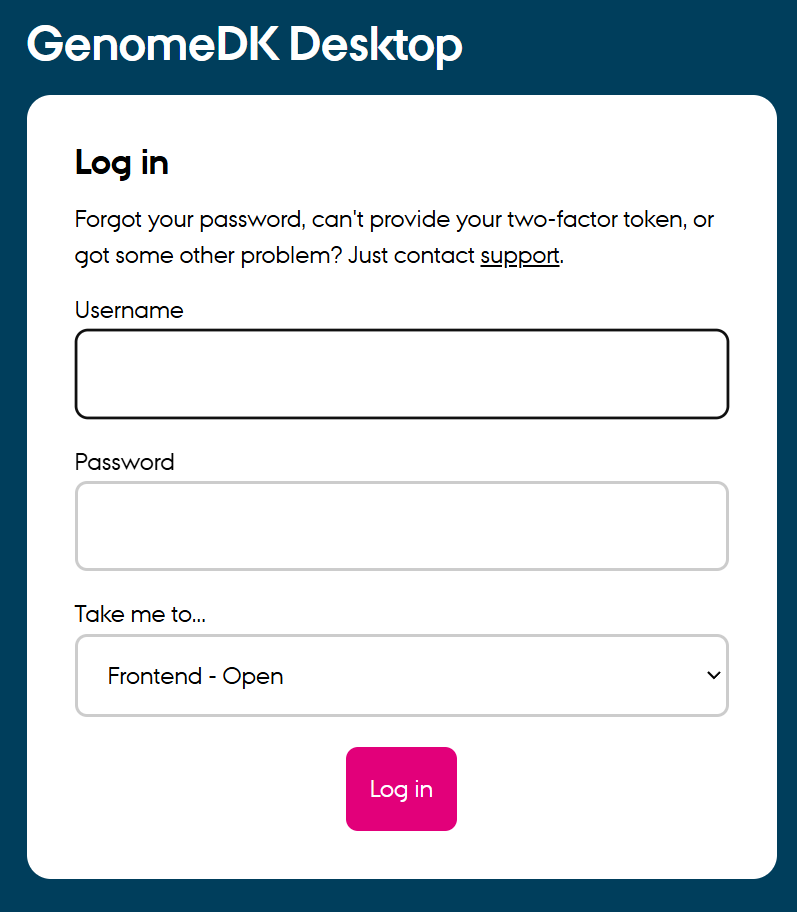
GenomeDK
You can run the Genomics sandbox on GenomeDK. Use virtual desktop on your browser at the address desktop.genome.au.dk. First, log into the virtual desktop by filling in name and password for GenomeDK at the webpage desktop.genome.au.dk.
To run the tutorial, you need to be able to use a project folder on GenomeDK. You can go into that folder using the file browser (toolbar at the bottom of the virtual desktop), and create a subfolder to run the material into. You can use the right-click button and choose Create folder (green circle below).
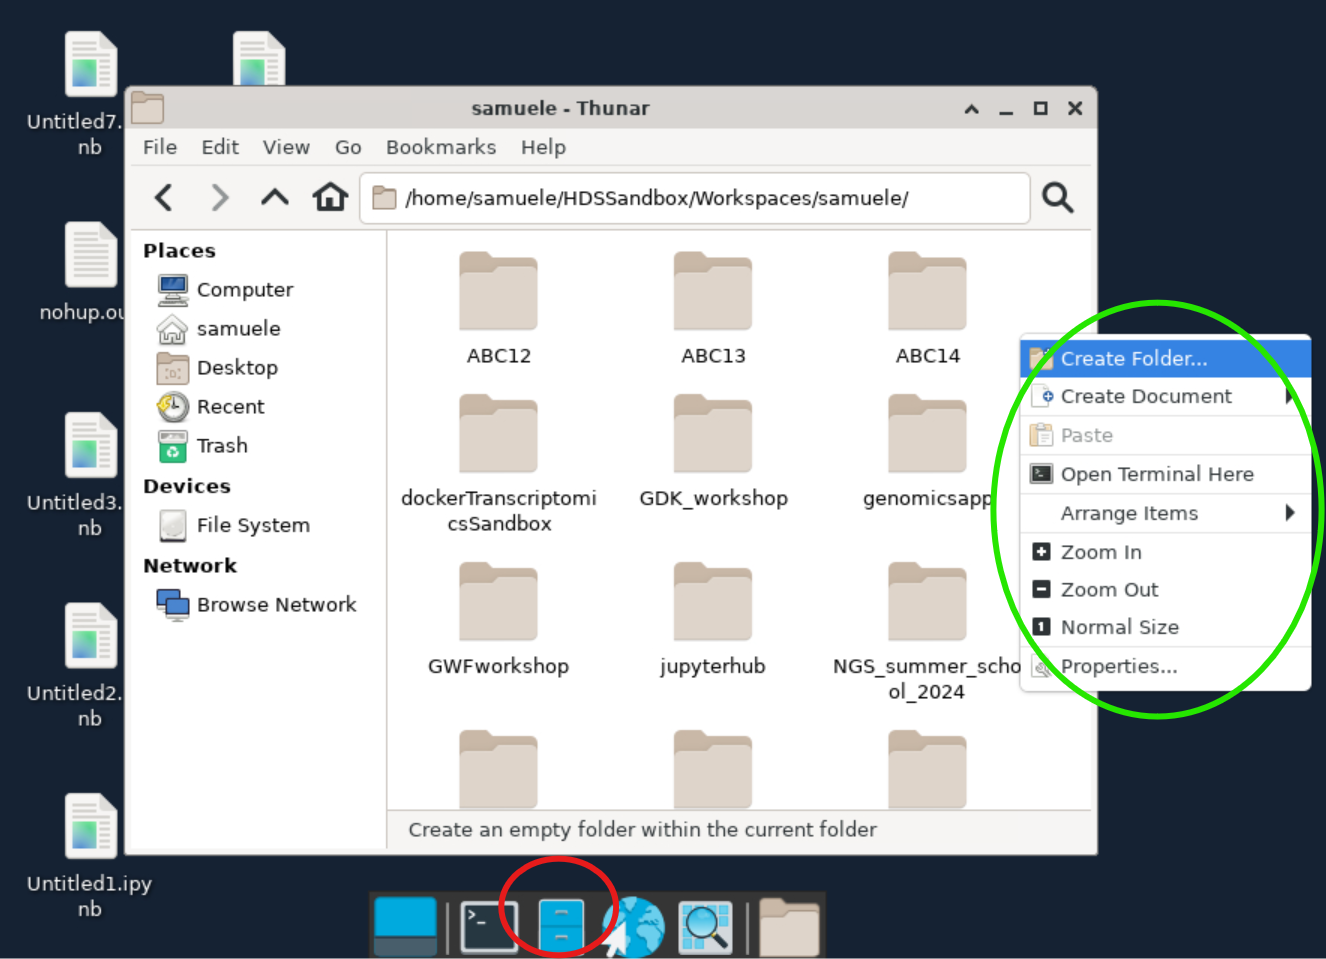
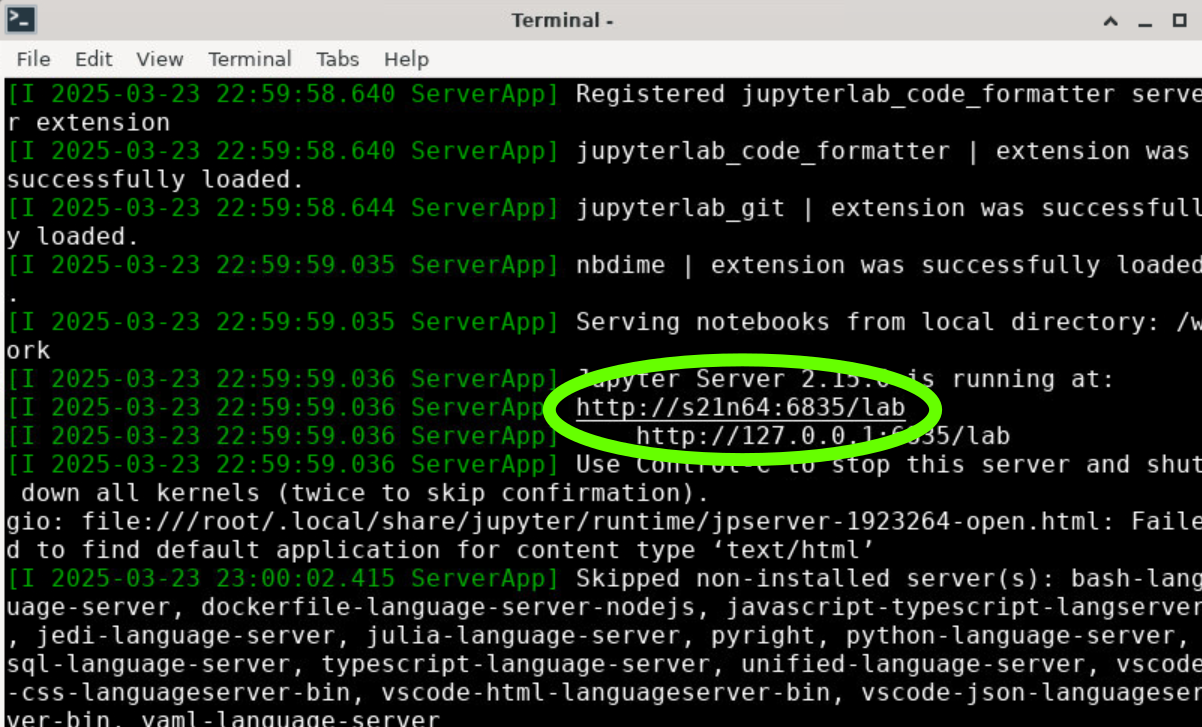
Now, right-click inside the create folder and choose Open Terminal Here. You should see a terminal window like below
You need to copy-paste some commands. To copy text from your pc to the virtual desktop, you need to first paste it into the clipboard, which you can open clicking Show clipboard on the top-right corner of the desktop.

First of all, we need to download the container using singularity. Run this command:
SINGULARITYENV_OMP_NUM_THREADS=1 singularity pull genomicsapp_latest.sif docker://hdssandbox/genomicsappIt takes time, so be patient.
Now download the script to run the genomics sandbox
wget https://raw.githubusercontent.com/hds-sandbox/Genomics_app/refs/heads/main/scripts/chooseCourse.sh?token=GHSAT0AAAAAAC4XE7DM35ZLCCG5SLYNORYYZ7AQ72A

chmod + chooseCourse.sh
Execute the script and follow the interactive instructions: you need to choose a course, folder with the container, and amount of computing resources.
bash chooseCourse.shOnce finished, you will start a job on the cluster. When you get through the queue and download all the data (data downloaded only the first time), you will need to open the provided address in the command line (green circle below).