Publishing
A small guide on how to publish your own documentation using Github + Quarto + Jupyter notebooks.
You do not need much to try publishing your own jupyter notebooks:
- A Github account (the free tier is completely fine)
- Quarto installed on your computer (optional, if you want to preview your website)
- Whatever IDE/editor you prefer to use for coding
Github template
We have created a template on Github which can be used to recreate the same exact documentation you are reading now, which consists of few webpages with text and some others with code, created from the jupyter notebooks tutorials.
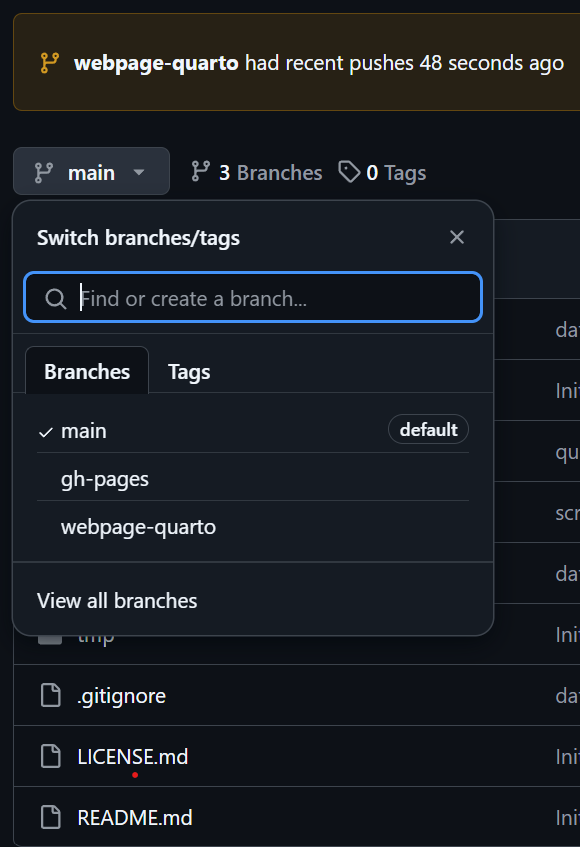
The template is structured in three branches:
- main where you can copy code, scripts, data, notebooks of your research project
- webpage-quarto where you have the webpage written in markdown or jupyter notebooks
- gh-pages where the webpage is automatically loaded every time you modify it in the webpage-quarto branch.
Once you copy the template to create a repository in your own account, you will be able to see the same webpage you are visiting, which you can modify with your own menus, pages and notebooks!
A guide for using the template
You can get and use the template as it follows
- Click on the button below to go to the template page.
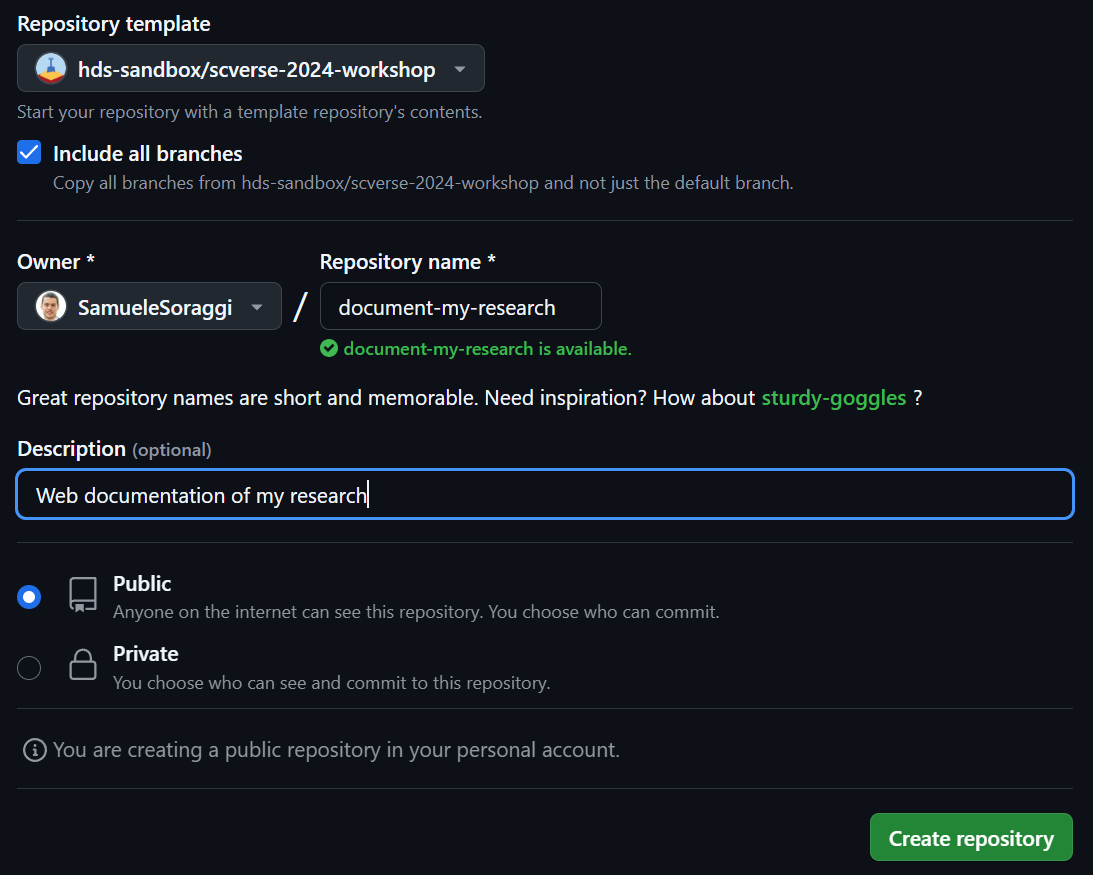
- Choose
Use this template, thenCreate a new repository

- Select
Include all branches. This will copy all the branches mentioned before. Then provide a name and description of your repository, and choose if the repository has to bePublicorPrivate.
Remember that a Private repository cannot show the webpage if you have the free tier Github account.

- Now the repository is created in your account. The same webpages you are visiting now will be visible to you at an address of the type
https://username.github.io/repository-name-you-chose. You will be able to see all the branches available using the drop-down menu.

- If you open the branch
webpage-quarto, you should see a small message sayinginitialize webpage-quarto. This is a so-called Github action. Everytime you modify something in the branchwebpage-quarto, the webpage will be rendered again, copied in the branchgh-pages, and becomes visible at the web address!

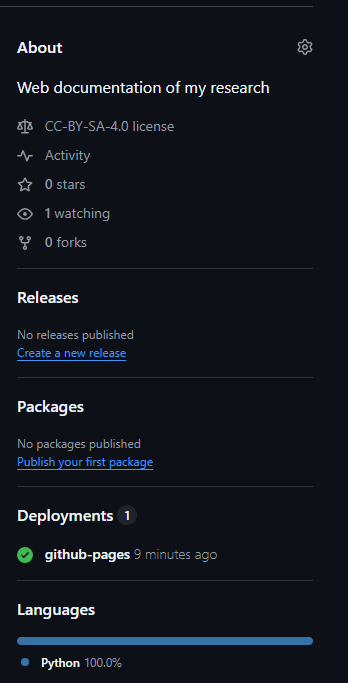
- On the right side of the repository, you can change the description by clicking on the small symbol located on the top-right corner. You can include the web address, which you can find clicking on
Github pages. In this way your webpage address will appear as part of the description

Downloading the branches
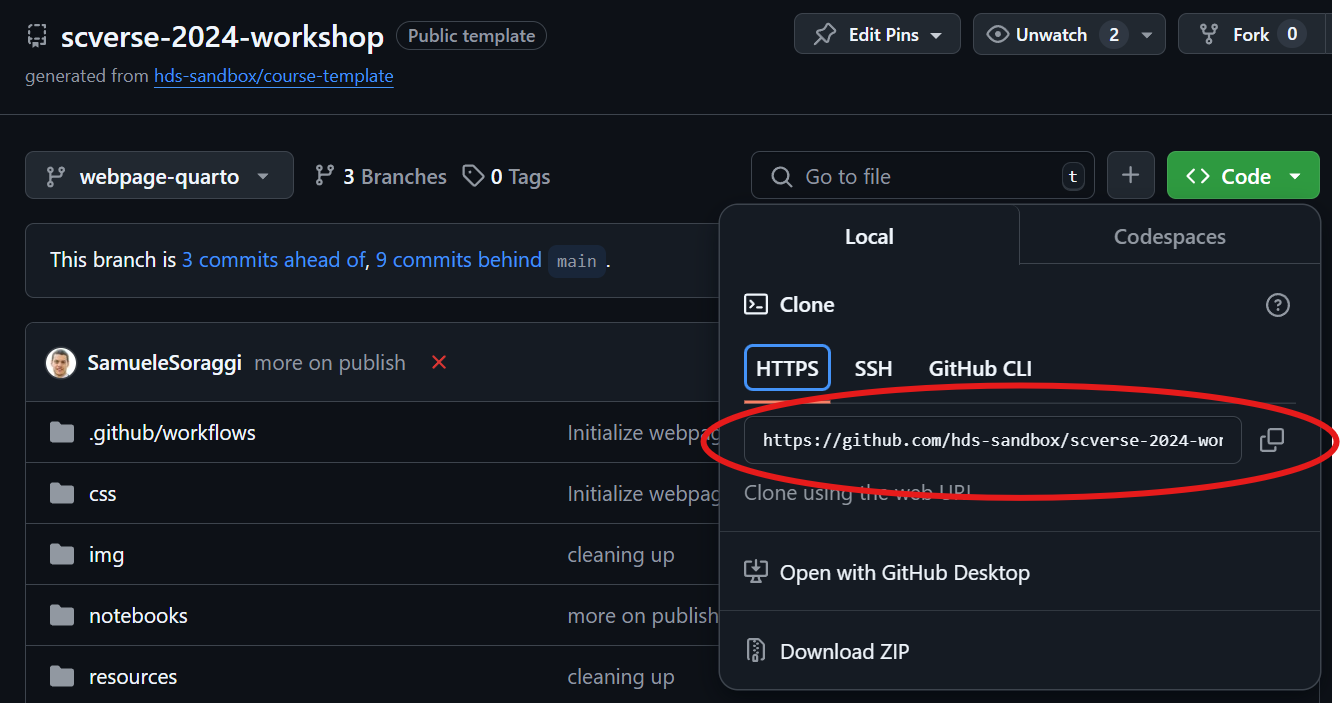
The branches can be downloaded and synchronized using the command line or the software github desktop. To download the two branches from the command line, click first on the green button Code, and copy the repository address.

Then use the command line to write
git clone -b main ADDRESS-YOU-COPIED your_main
git clone -b webpage ADDRESS-YOU-COPIED your_webpage
This will create two folders called your_main and your_webpage which you can keep synchronized with github. Pushing changes in the folder your_webpage will update the branch webpage-quarto.
Modifying the material
Main branch
The material for your research project should be saved in the main branch. Here you can keep your code, (small) datasets, notebooks, scripts and so on. For large datasets it is better to use other services like Zenodo, which allows up to 50GB per file, and is free.
Webpage-quarto branch
Here you find the description of the main files composing the website. Once you understand how notebooks and markdown files are used to structure the webpage, you can use your own notebooks and create your own markdown pages, update the changes on github, and get your documentation website!
Remember that the webpage will be created automatically every time you push changes to github for the branch webpage-quarto. This is done possible because we have created a workflow in the repository, which can be seen in .github/workflows/publish.yml. In this way you can avoid to create the rendered webpage by hand with quarto every time you do a change.
Webpages in quarto format
There are two webpages in markdown format - index.qmd and publish.qmd - corresponding to the welcome page and to this webpage. Open them and you will see how the text is simple markdown. The only exception is the meta-data at the beginning of each page, with a few descriptive items which are quite self-explicative.
Guide with the HTML basics for the options you can use in the metadata
Notebooks
In the folder notebooks you can see the tutorials. Those will be converted into web format for the webpage, and again need some metadata at the beginning both for descriptive purposes, but also to choose various options.
To see the basic example on notebook on the Quarto documentation, click here. Another example for inspiration can be found here.
By default, the notebook does not run when the webpage is created, and is instead kept with the shown results.
Guide with the jupyter notebooks basics
YML setup
The file _quarto.yml contains all the webpage structure. The section
website:
  title: "Course Template"
  navbar:
    logo: /img/logo.png
    left:
      - href: index.qmd
        text: Welcome
      - href: publish.qmd
        text: Publish
      - href: notebooks/interactivePlotsTransc.ipynb
        text: Tutorial
    right:
      - icon: github
        href: https://github.com/hds-sandbox/scverse-2024-workshop
        aria-label: GitHub
is used to define
- the title and logo of the webpage (the
logo.pngfile in theimgfolder) - the menus on the left side of the navigation bar (
left:). Here you can see the welcome page, the publishing guide and the notebook. - the link to the github repository on the right side of the navigation bar (
right:), which you need to update according to your new repository
The last part of the file defines themes for the light and dark mode, which you can personalize if you want. We personalized the light theme with a scss file. For more information about available themes, look here
You can easily add or modify content in the menu toolbar starting from this file as an example.
More info about the YML file to define the website navigation can be found in this documentation
Ok, now you should have gotten the very basics to get your website up and running, starting from the example in the template.
Note how in the tutorial page, the interactive plots can be actively used in the documentation!
The interactive plots you can see in the tutorial rendered as a webpage will not work if you do the plots on a notebook executed with google colab.
This is because Colab has specific settings to do interactive plots, and those cannot work with Quarto.
Thus remember to run your notebooks on jupyterlab - your plots will work also on your webpage!
Also, to make your metadata and callout boxes seen while you develop a notebook, install the plugin for jupyterlab with
pip install jupyterlab-quarto