Accessing the NGS summer school on UCloud
1. User accounts on UCloud are enabled by university login credentials using WAYF (Where Are You From). Access the WAYF login portal with the button below here, and then find your affiliated university or institution using the search bar.
If you are participating in the NGS Summer Course 2024 in Aarhus, click AFTER logging in on the button below. This will add you to a project on uCloud, where we have data and extra computing credit for the course. You should see a message on your browser where you have to accept the invitation to the project. The link expires 30 days after the course.
2. Once you are an approved user of UCloud, you are met with a dashboard interface as below. Here you can see a summary of the workspace you are using, like the hours of computing, the storage available, and other informations. The workspace you are working on is shown in the top-right corner (red circle). On the left side of the screen you have a toolbar menu.
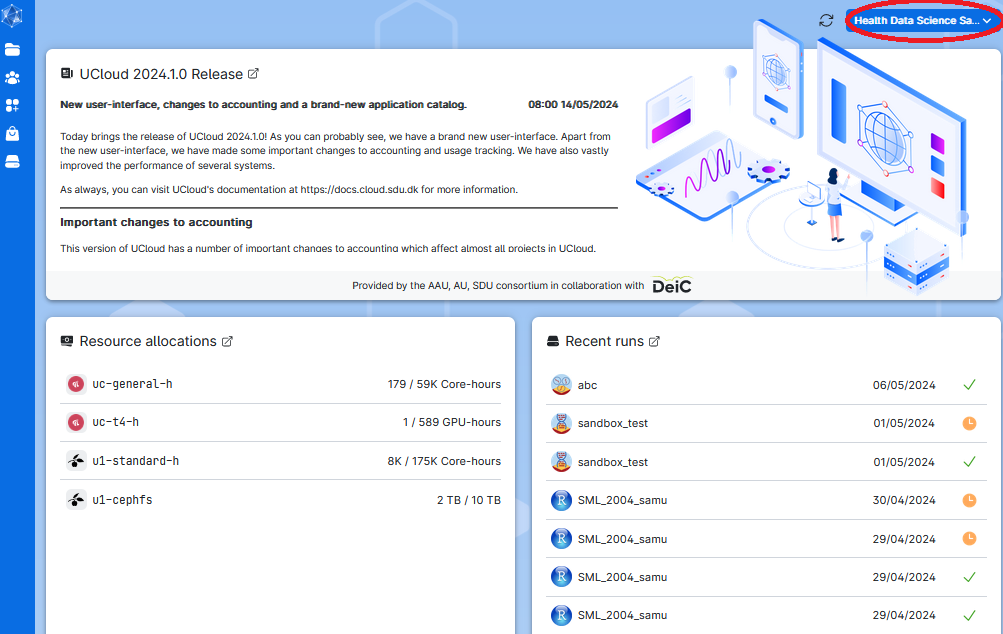
If you are participating in the NGS Summer Course 2024 in Aarhus, choose the workspace NGS summer school.
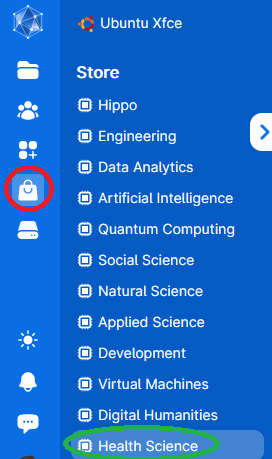
3. The left-side menu can be used to access the stored data, applications, running programs and settings. Use the Applications symbol (red circle) and click on the Health Science store (green circle).
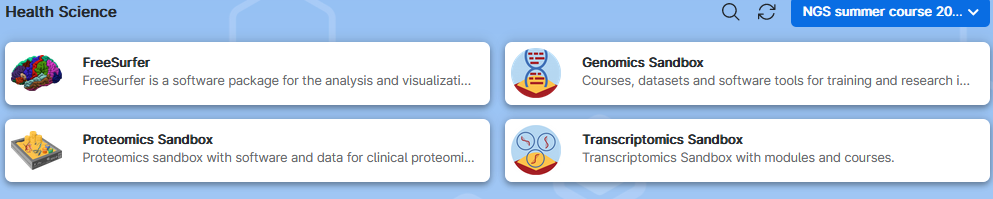
5. Your screen will show some apps falling in the Health Science subcategory. Click on the Genomics Sandbox application to open its settings.
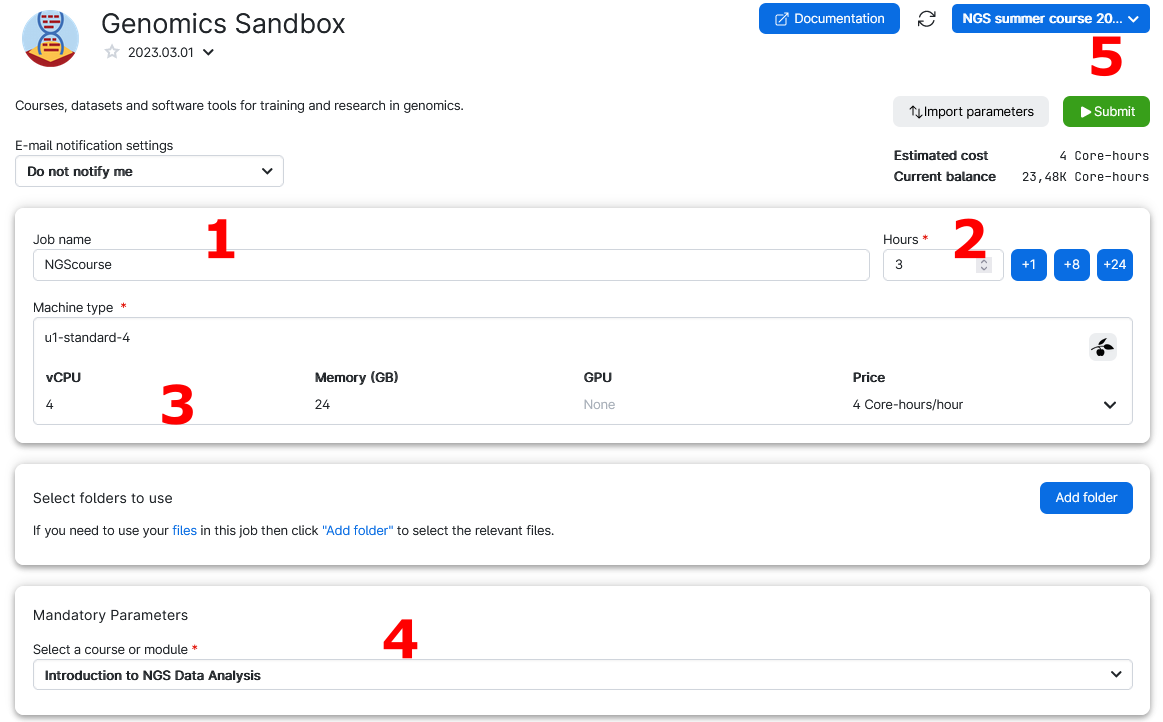
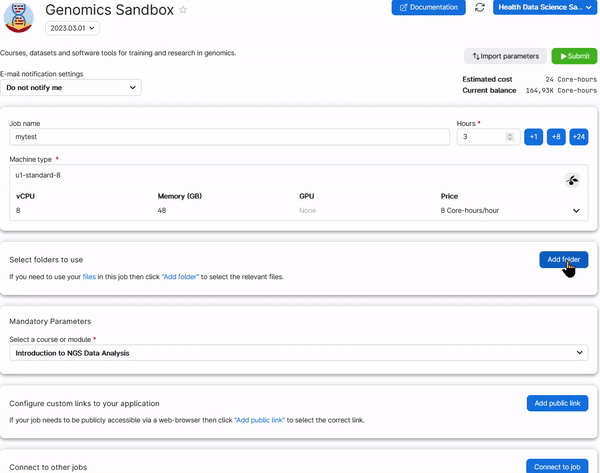
6. Choose any Job Name (Nr 1 in the figure below), how many hours you want to use for the job (Nr 2, choose at least 2 hours, you can increase this later), and how many CPUs (Nr 3, choose at least 4 CPUs for the first three exercises, but use at least 8 CPUs to run the single cell analysis). Select the Introduction to NGS Data Analysis as course (Nr 4). Then click on Submit (Nr 5).
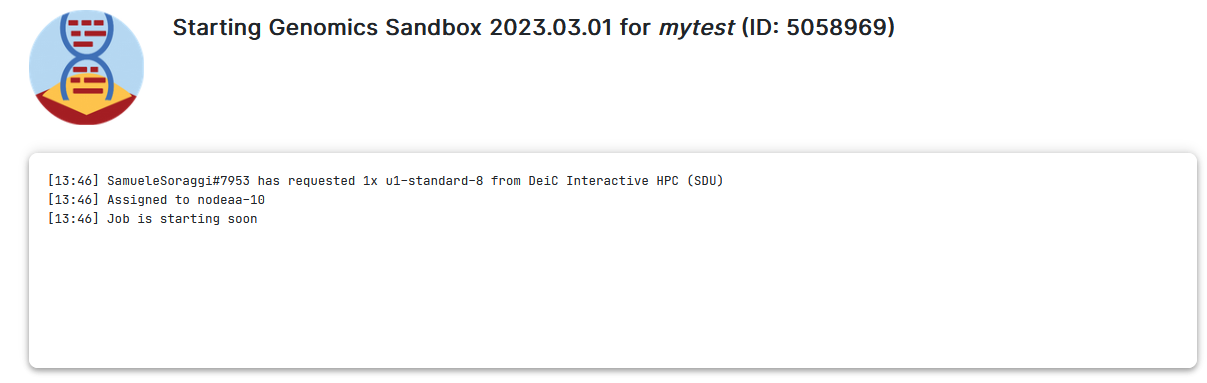
7. You will be waiting in a queue looking like this
8. As soon as there are resources, you will have them available, and in a short time the course will be ready to run. The screen you get is in the image below. Here you can increase the number of hours you want the session to run (red circle), close the session (green circle) and open the interface for coding (blue circle)
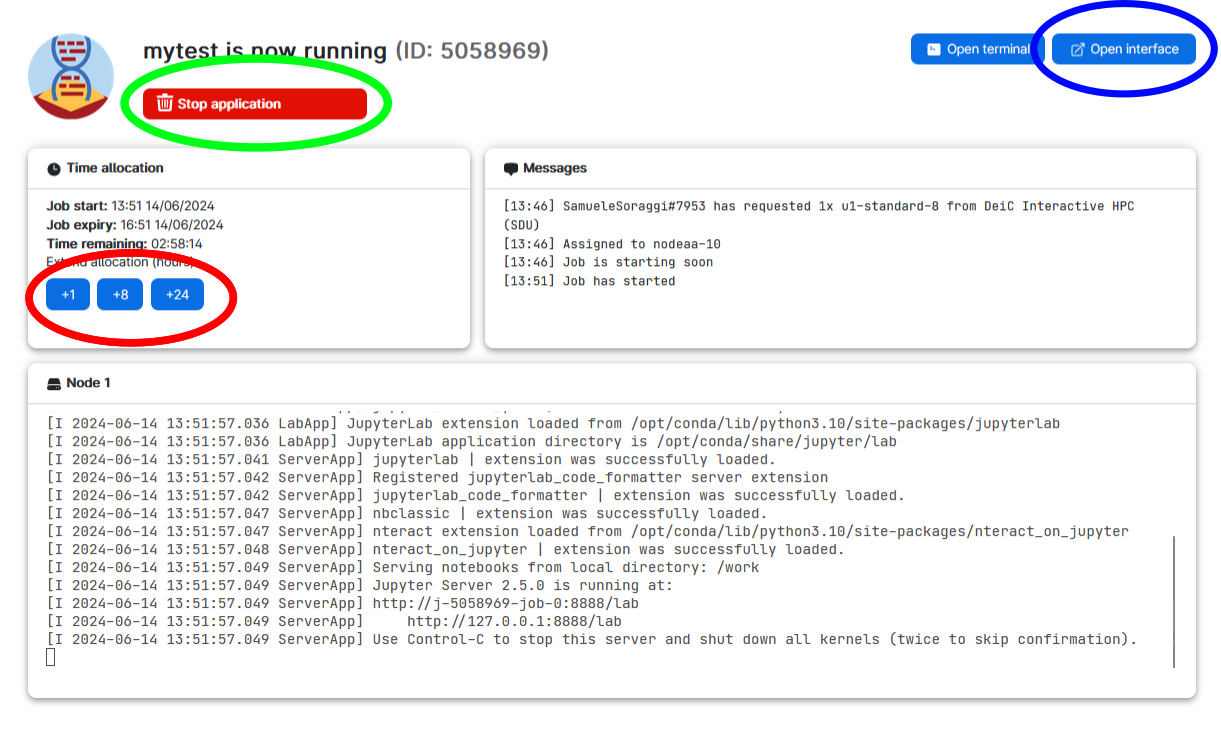
Once you open the coding interface, it does not matter if you close the browser tab with the countdown timer. You can always access it again from the toolbar menu of uCloud. Simply click on jobs and choose your session from the list of running softwares:
9. Now you are ready to use JupyterLab for coding. Use the file browser (on the left-side) to find the folder Notebooks. Select one of the four tutorials of the course. You will see that the notebook opens on the right-side pane. Read the text of the tutorial and execute each code cell starting from the first. You will see results showing up directly on the notebook!

Recovering the material from your previous session
It would be annoying to start from scratch at each session, with all the analysis to be executed again. You can of course find all the notebooks and results in your personal user folder in the workspace in which you are working.
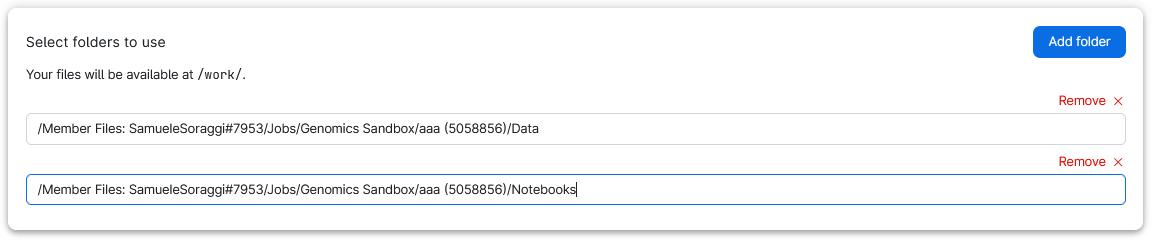
To retrieve your work add the folders Data and Notebooks in the submission page of the Genomics App. Those are inside your user folder (called member Files: NameSurname#Number) under Jobs/Genomics Sandbox/SessionName. For example, look at how the Data folder is added from a previous session:
You need to do the same thing for the folder Notebooks. In the end you should have two folders added in your setup page just as below: