HPC setup
Several commands in this section require elevated privileges on Windows. Right-click PowerShell and select Run as Administrator before you start, otherwise you may encounter cryptic permission errors (e.g. ssh-agent failing to start).
If you are using a different terminal application, ensure you run it as an administrator.
1. SSH keys
Local host keys
Navigate to the location where all SSH keys are stored to generate a new one. Do you have any host keys stored locally?
SKIP these first two commands if you haven’t used SSH keys before (the path won’t exit if you’ve never created a key).
Mac/Linux
cd ~/.ssh
cat ~/.ssh/known_hosts
Windows
cd C:\Users\<YourUsername>\.ssh
cat C:\Users\<YourUsername>\.ssh/known_hosts
1.1. Generate SSH Key Pair
We will specify the type of key with -t and save it under a descriptive filename (e.g. id_UCloud). Don’t enter a passphrase (for now!).
The commands below generate the key pair directly without any interactive prompts:
Mac/Linux
ssh-keygen -t ed25519 -f ~/.ssh/id_UCloud
Windows (PowerShell)
ssh-keygen -t ed25519 -f "$env:USERPROFILE\.ssh\id_UCloud"ssh-keygen not working?
This might be due to broken permissions.
When you run the command above and ~/.ssh does not exist → it is created automatically. IF this didn’t happen in your system, run the following command:
mkdir -p ~/.ssh
ssh-keygen -t ed25519
ssh-agent service disabled?
There is one additional thing you need to take care of. By default, the ssh-agent service is disabled on Windows, so make sure you’re running as an Administrator.
On Powershell
# Configure it to start automatically.
Set-Service -Name ssh-agent -StartupType Automatic

# Start the service
Start-Service ssh-agent

# This should return a status of Running
Get-Service ssh-agent
On WSL (Windows Subsystem for Linux)
eval `ssh-agent -s`On MombaXterm, follow the instructions here.
ssh-keygen -t ed25519Generating public/private ed25519 key pair.
Enter file in which to save the key (/Users/gsd818/.ssh/id_ed25519): id_UCloud
Your identification has been saved in id_UCloud
Your public key has been saved in id_UCloud.pub
...When prompted Enter file in which to save the key, type id_UCloud (do not just press Enter — that keeps the default name and will cause the later steps to fail).
1.2. Add private key to ssh-agent
Once you have generated your SSH keys, add the private key to your system’s ssh-agent (id_UCloud is the filename you specified when generating the key):
Mac/Linux
ssh-add ~/.ssh/id_UCloud
Windows (PowerShell)
ssh-add "$env:USERPROFILE\.ssh\id_UCloud"Do you get a message similar to this? entity added: id_UCloud (gsd818@SUN1029429)
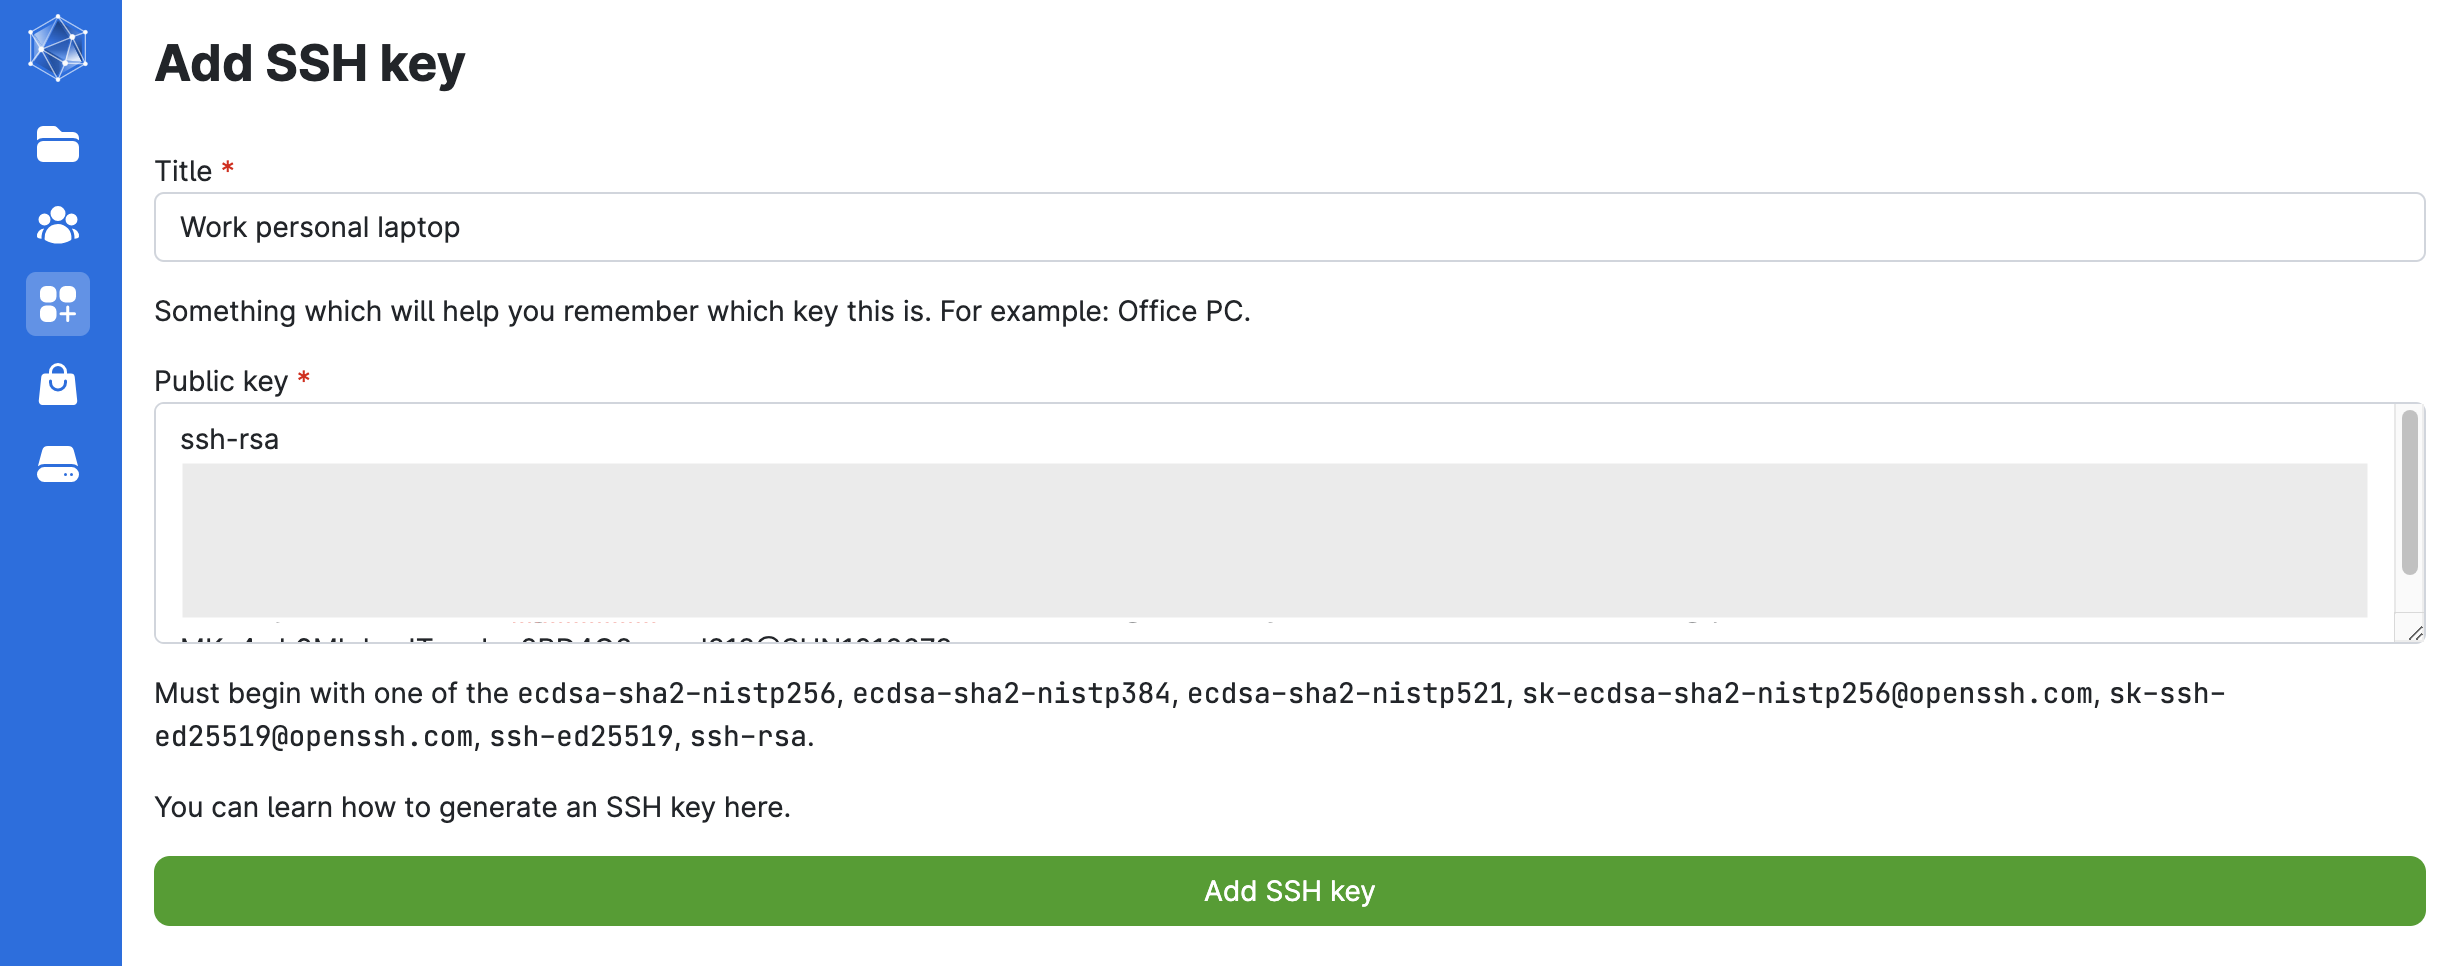
1.3. Copy SSH Key to remote server
Then, copy the public key to your clipboard:
Mac
cat ~/.ssh/id_UCloud.pub | pbcopy
Linux
cat ~/.ssh/id_UCloud.pub | xclip -selection clipboard
Windows (PowerShell)
cat "$env:USERPROFILE\.ssh\id_UCloud.pub" | clipYou can now paste the public SSH key on UCloud. Go to UCloud → SSH Keys → Create and paste the key there.
You’ll need to enable SSH access when you submit a job so you can SSH in.
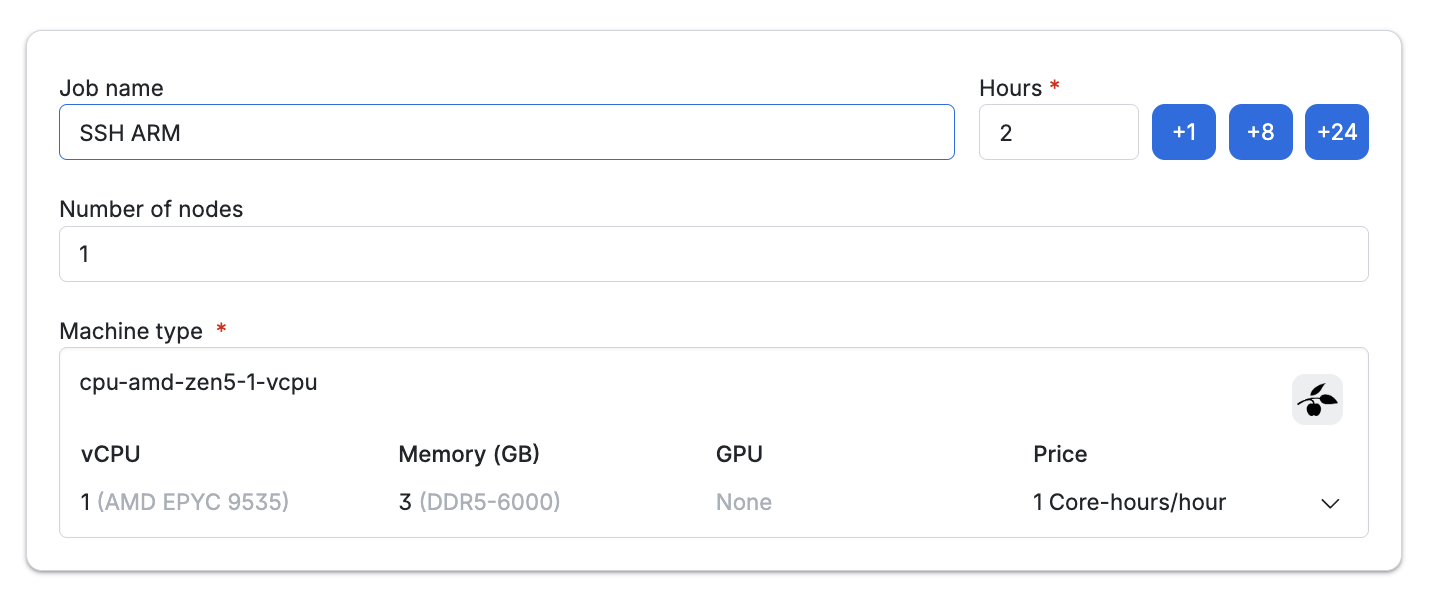
Start a UCloud job with SSH access.
Submit a job from the terminal app and follow these configuration steps (job settings):
Enter a job name (descriptive of the task, e.g.: SSH myname)
Select the time (in hours) we want to use a node for (it can be modified afterwards!). Let’s do 2h.
Number of nodes: 1
Machine type: and the machine type (selecting a 1 CPU standard node with 3GB memory).
Add folders to access while in this job . We recommend creating a new folder named HPCLaunch in your personal drive, where you can store all files generated during the workshop (e.g.:
/Member Files: username/HPCLaunch).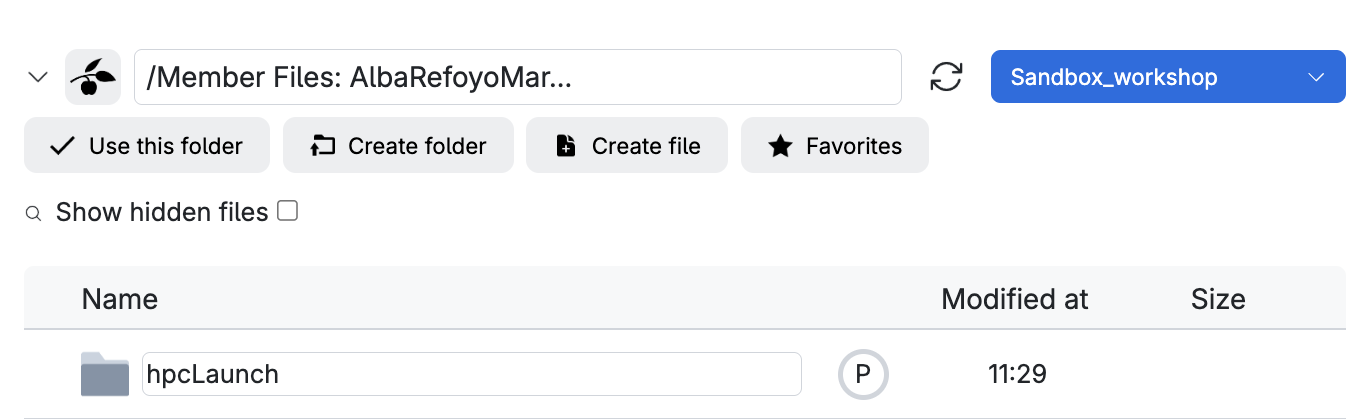
Scroll down and remember to click on Enable SSH access.

Now you are ready to click on the submit button (and wait!).
Once the job starts, click the SSH tab in the progress view to reveal the SSH command, then copy it and paste it in your local terminal: 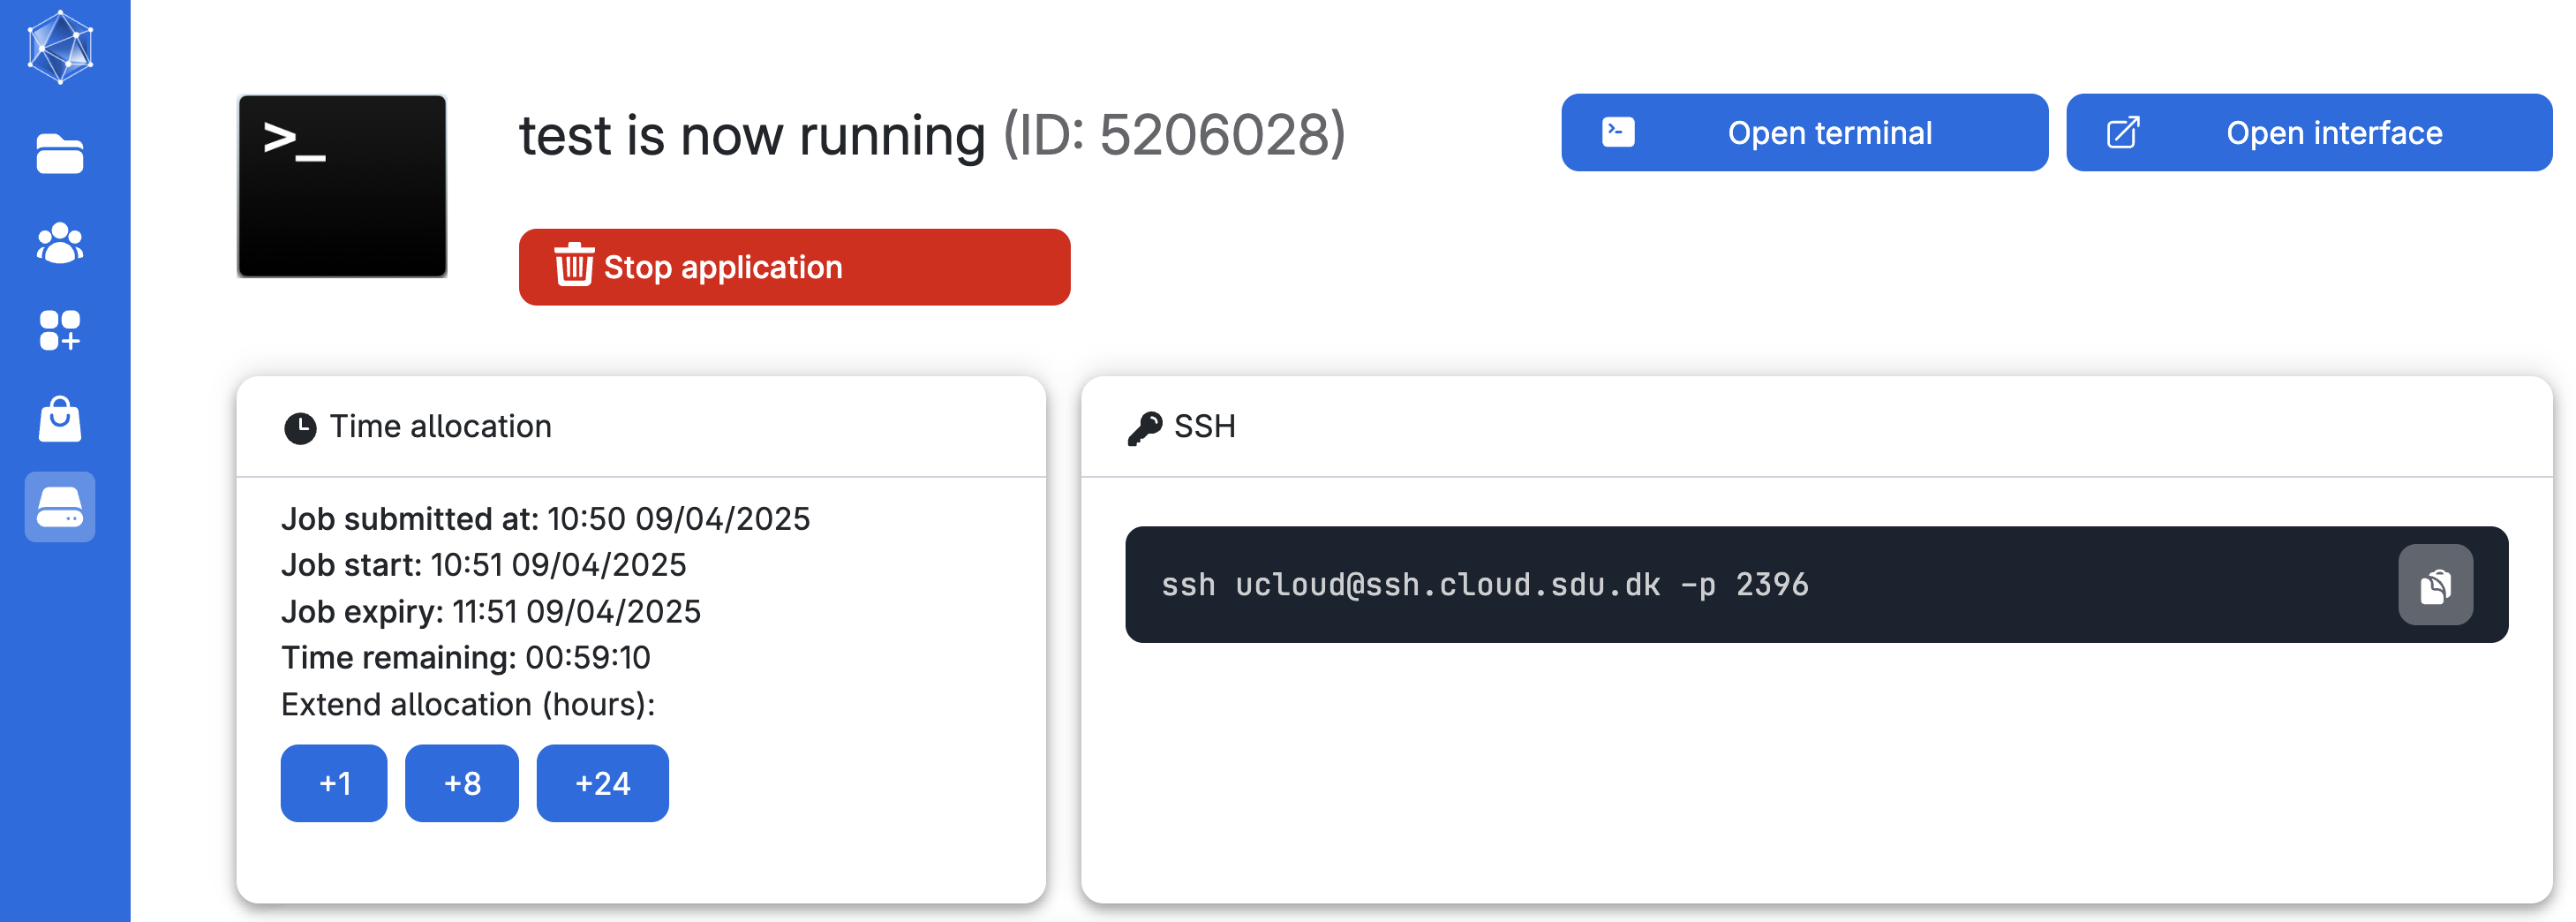
For example: ssh ucloud@ssh.cloud.sdu.dk -p 2126